The content of this document may be incorrect or outdated.
Print this article Edit this article
HOWTO: Install the SQL Server 7.0 Client Utilities
Summary
In order to access the ECN central SQL Server database remotely, you must install the Microsoft SQL Server Client Utilities on your workstation. This document explains the steps for installing these utilities.
Installing the SQL Server Client Utilities
To install the SQL Server 7.0 Client Utilities, follow these steps:
- If you have not done so already, map S: to \\ohare.ecn.purdue.edu\public.
- From the S:\tools\pub\software\Admin Tools\SQL Server\7.0\setup\ directory run SETUP.BAT.
-
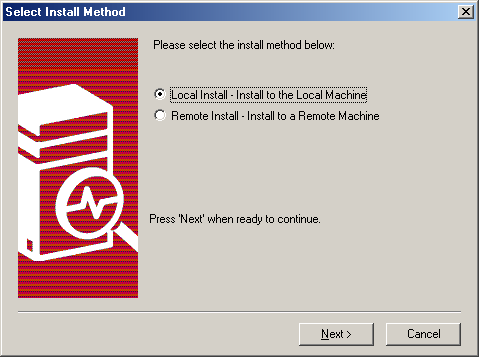
In the Select Install Method dialog (shown in Figure 1), select Local Install - Install to the Local Machine.

Figure 1: Select Install Method dialog -
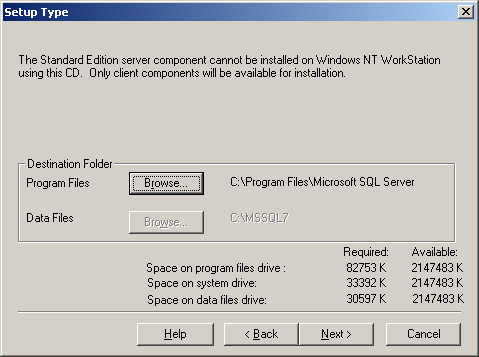
If you receive the message:
The standard edition server components cannot be installed on Windows NT workstation using this CD. Only client components will be available for installation.
Just click OK. - When the Welcome dialog box apears, click Next.
- Read the license agreement and click Yes.
-
In the User Information dialog box (shown in Figure 2), enter Engineering Computer Network for the name and Purdue University for the company. Click Next when finished.

Figure 2: User Information dialog - If prompted for a CD key, enter 111-1111111. Click OK and then OK again in the product information dialog.
-
In the Setup Type dialog box (shown in Figure 3), change the Program Files directory to C:\Program Files\Microsoft SQL Server. Click Next when finished.

Figure 3: Setup Type dialog -
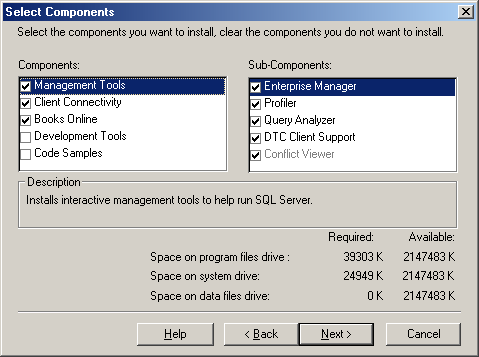
In the Select Components dialog box (shown in 4), just click Next. The options chosen should reflect those shown in Figure 4 below.

Figure 4: Select Components dialog - To start copying program files, click Next. Let the setup copy files. When it completes, click the Finish button.
Installing the Latest SQL Server Service Pack
Once the SQL Server 7.0 Client Utilities are installed, you will need to update the installation with the latest service pack for Microsoft SQL Server 7.0. To update your installation, follow these steps:
- From the S:\tools\pub\software\Admin Tools\SQL Server\7.0\service_pack directory run SETUP.BAT.
- When the Welcome dialog box apears, click Next.
- Read the license agreement and click Yes.
- To start copying program files, click Next. Let setup copy files. When it completes, you may be prompted to reboot the computer. If asked to do so, reboot. Otherwise, click the Finish button.
Last Modified:
Dec 19, 2016 11:12 am US/Eastern
Created:
Aug 9, 2006 12:59 pm GMT-4
by
admin
JumpURL:
