Print this article Edit this article
openconnect VPN config
These instructions are for a non-ECN, self-maintained linux host.
These were tested on a LinuxMint 19.3 host. It is Ubuntu derived so these should work on Debian and Ubuntu as well.
Other distributions should be similar if they use Network Manager.
- Check for openconnect packages
- Fedora/RHEL/CentOS derived:
sudo yum search openconnect network-manager-openconnect
sudo dnf search openconnect network-manager-openconnect - Debian/Ubuntu derived:
sudo apt search openconnect network-manager-openconnect
- Fedora/RHEL/CentOS derived:
- Install opeconnect packages
- Fedora/RHEL/CentOS derived:
sudo yum install openconnect network-manager-openconnect
sudo dnf install openconnect network-manager-openconnect - Debian/Ubuntu derived:
sudo apt install openconnect network-manager-openconnect - You might also need to install network-manager-openconnect-gnome depending upon your distro
- restart Network Manager to make sure the openconnect plugin is active
systemctl restart network-manager.service
- Fedora/RHEL/CentOS derived:
- Click on text based on your network icon
- Add/Configure VPN connection
- Click on Network Manager Icon

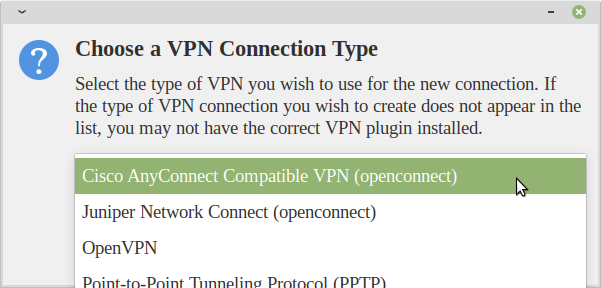
- Select VPN Connections -> Add a VPN Connection

- Select "Cisco AnyConnect Compatible VPN (openconnect)
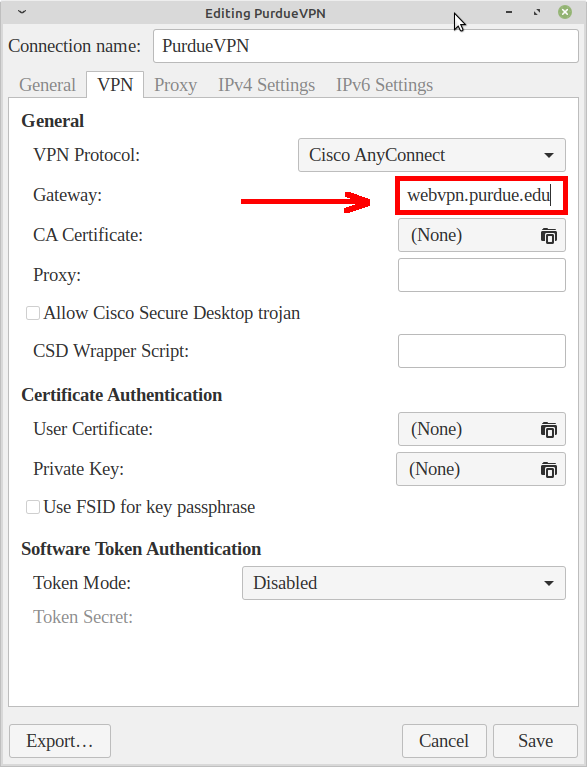
- VPN Config
- Connection Name: whatever, but PurdueVPN is good
- Gateway: webvpn.purdue.edu, or webvpn2.purdue.edu
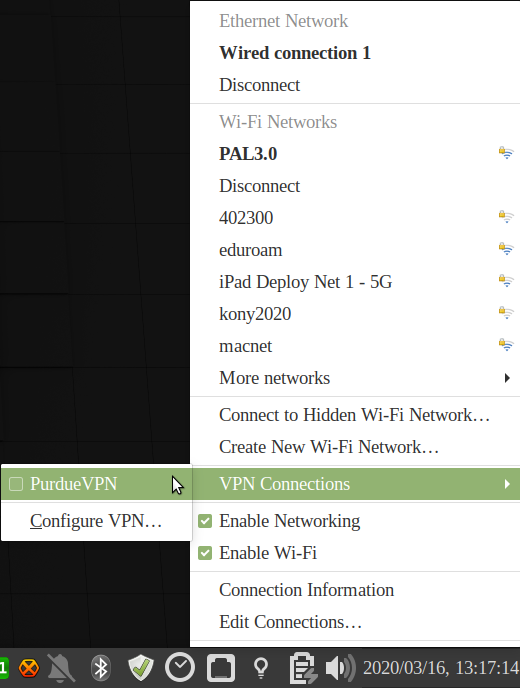
- Click on Network Manager icon

- Select VPN Connections ->PurdueVPN
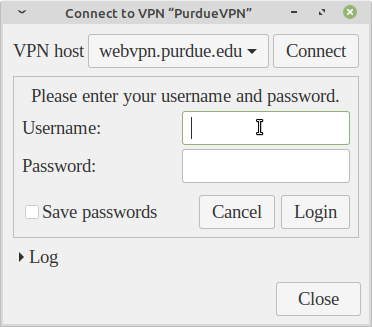
- Enter Username and Password
- The password follows the Purdue Login 2FA pattern which is your regular Purdue Account password followed by comma-'pin', (e.g. password,pin)
- The password follows the Purdue Login 2FA pattern which is your regular Purdue Account password followed by comma-'pin', (e.g. password,pin)
- The Network Manager icon can change to something like a lock

- To close the VPN connection click on Network Manager Icon

- VPN Connections->PurdueVPN
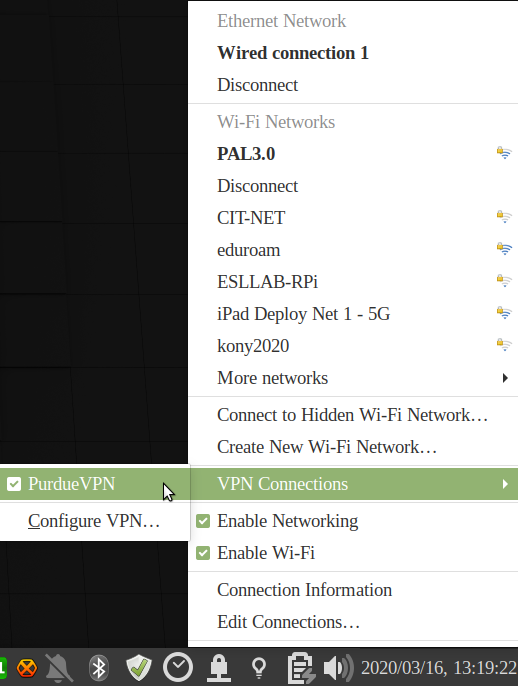
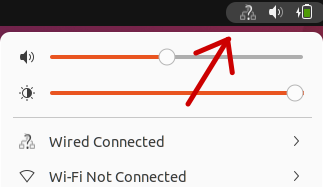
- Network Manager icon should go back to "normal"

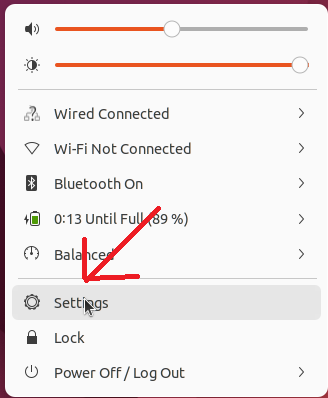
- Click on Network Manager Icon
- Click on Network Manager Icon

- Click on Settings item
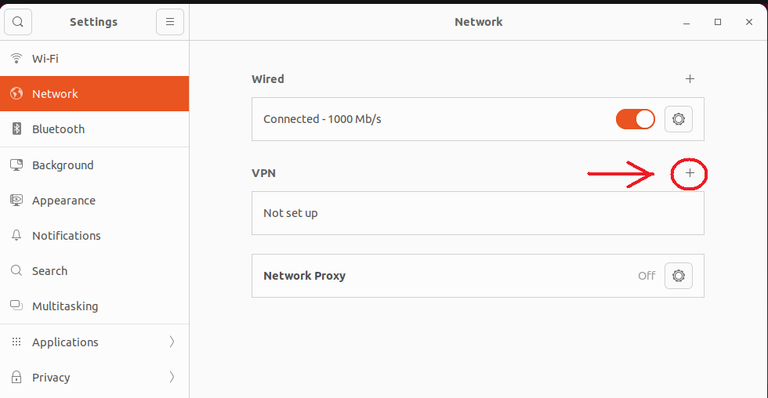
- Click on "+" symbol across from the VPN
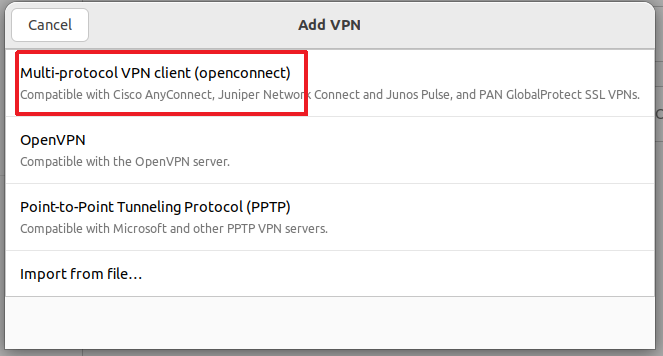
- Select Multi-protocol CPN client (openconnect)
- VPN Connection config
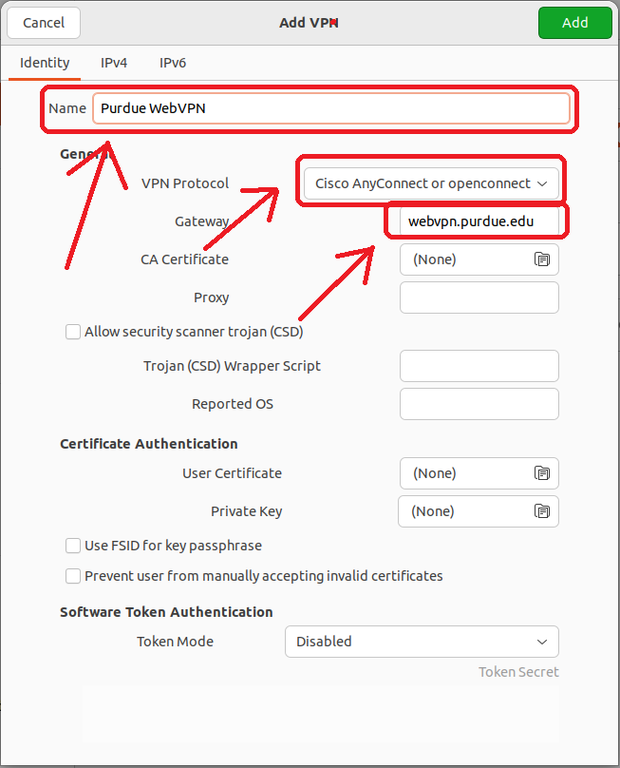
- Give the connection a name, for example "Purdue WebVPN"
- Make sure that "Cisco AnyConnect or openconnect" is selected for the VPN Protocol
- For the Gateway enter : webvpn.purdue.edu
- Then click on Add
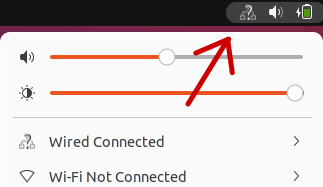
- To create a VPN connection click on network manager icon
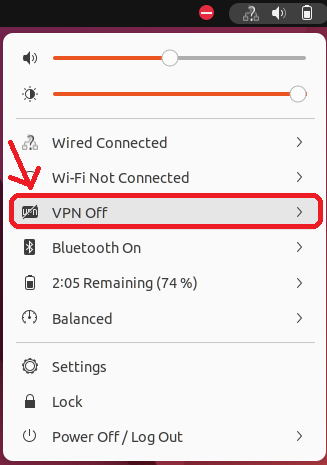
- Select "VPN Off"
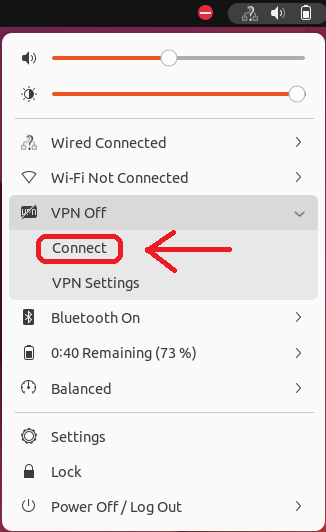
- Click on "Connect"
- Enter Username and Password
- The password follows the Purdue Login 2FA pattern which is your regular Purdue Account password followed by comma-'pin', (e.g. password,pin)
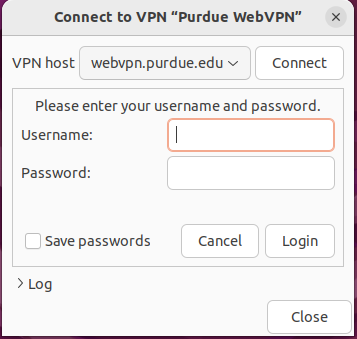
- The password follows the Purdue Login 2FA pattern which is your regular Purdue Account password followed by comma-'pin', (e.g. password,pin)
- The task bar will add an icon that says VPN
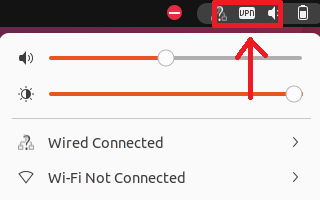
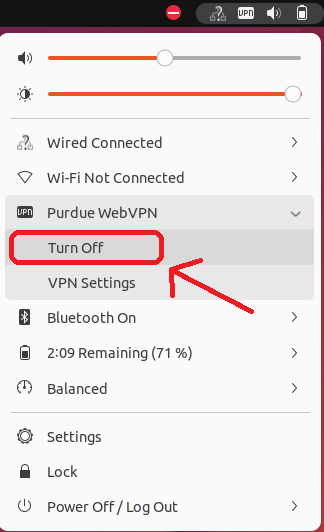
- To disconnect the VPN, Click on the VPN icon on the task bar
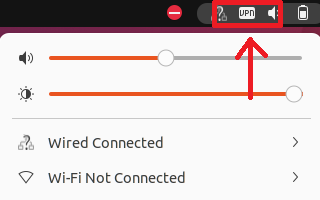
- Click on the name you gave the VPN connection, for instance Purdue WebVPN
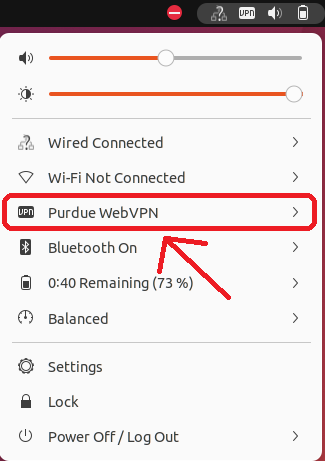
- Click on "Turn Off"
- Network Manager icon should go back to "normal"
Last Modified:
Feb 28, 2024 3:19 pm US/Eastern
Created:
Mar 16, 2020 10:59 am GMT-4
by
admin
JumpURL:

