The content of this document may be incorrect or outdated.
Print this article Edit this article
Downloading, Installing, and Licensing NX
Currently the university's license for NX12 allows for installation on personally owned systems for instructional use.
System Requirements:
- OS: Windows 10
- CPU: Any Quad-Core CPU should be sufficient
- RAM: 4GB is the minimum, 8GB or more is recommended
- Storage Space: At least 20GB
- GPU: Integrated graphics are sufficient, discrete graphics (AMD, NVidia) are recommended
Installation Instructions:
- You will need to be connected to the Purdue VPN to obtain the media. We have an illustrated guide on obtaining and authenticating with the Cisco AnyConnect Client here.
- Once you are connected, open File Explorer by pressing the Windows Key+E, then select "Map Network Drive"
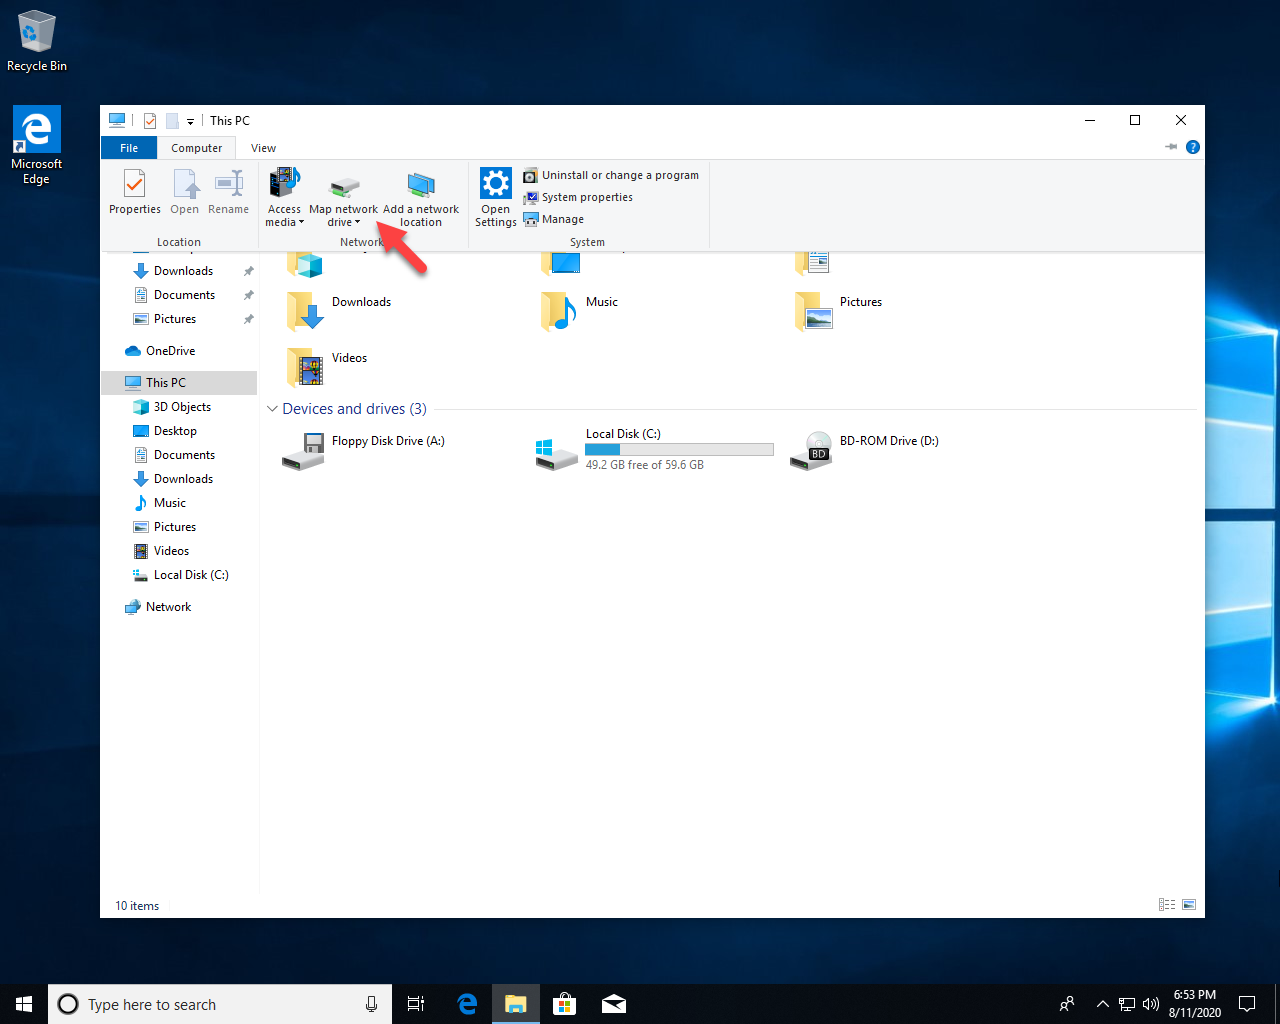
- In the Folder field, enter:
FOR NX 12: \\ecn-beldin.boilerad.purdue.edu\software\nx\12.0.2\
FOR NX 1946: \\ecn-beldin.boilerad.purdue.edu\software\NX\1946\
FOR NX 2306: \\ecn-beldin.boilerad.purdue.edu\software\NX\2306\
Also make sure to check "Connect Using Different Credentials"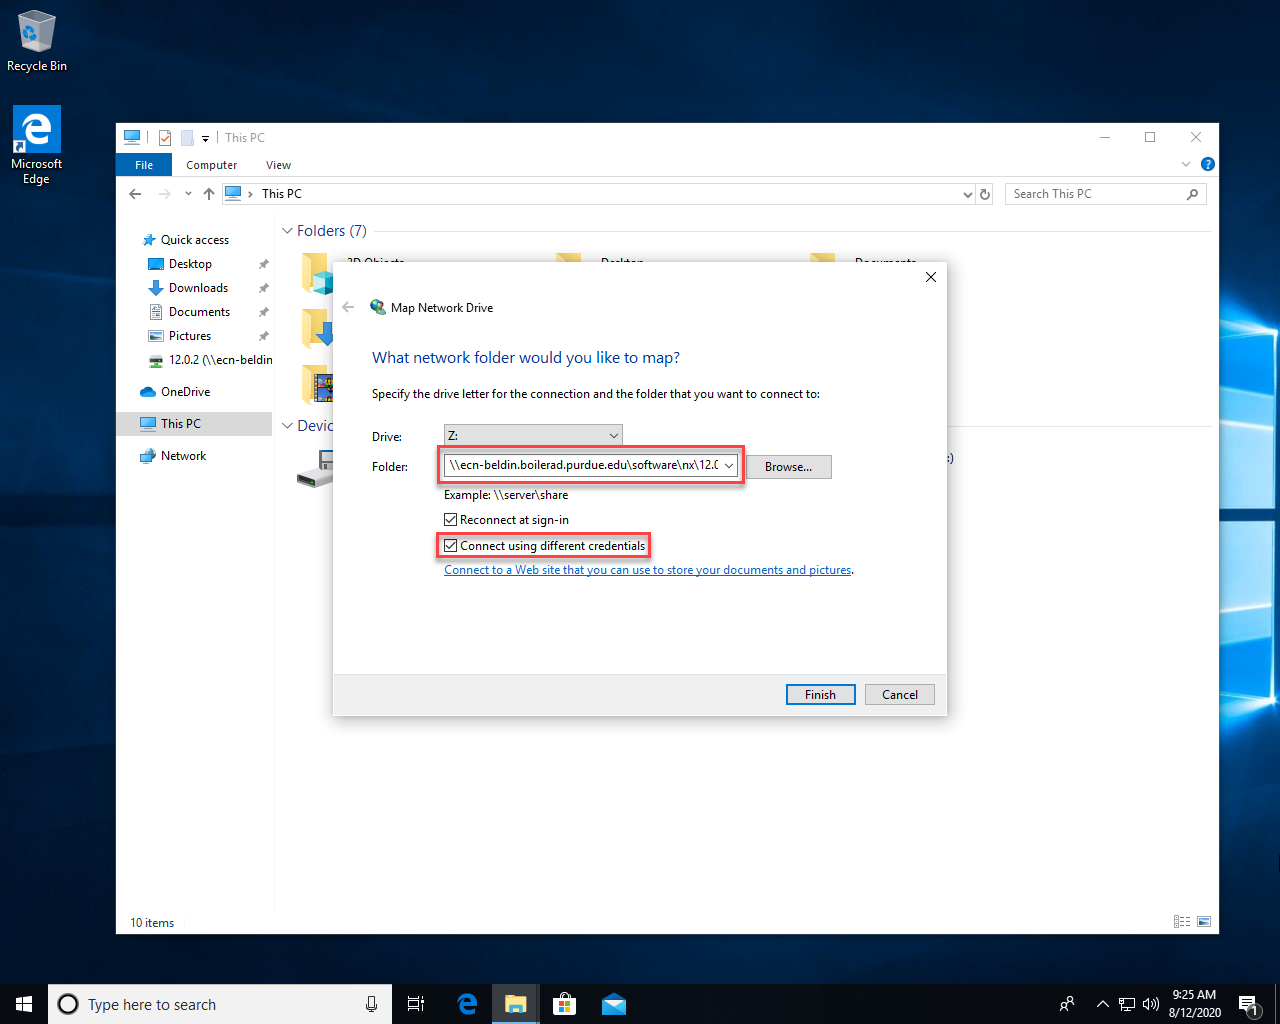
- When asked for credentials, enter your username as: boilerad\yourusername
(substituting your career account username)
and use your career account password.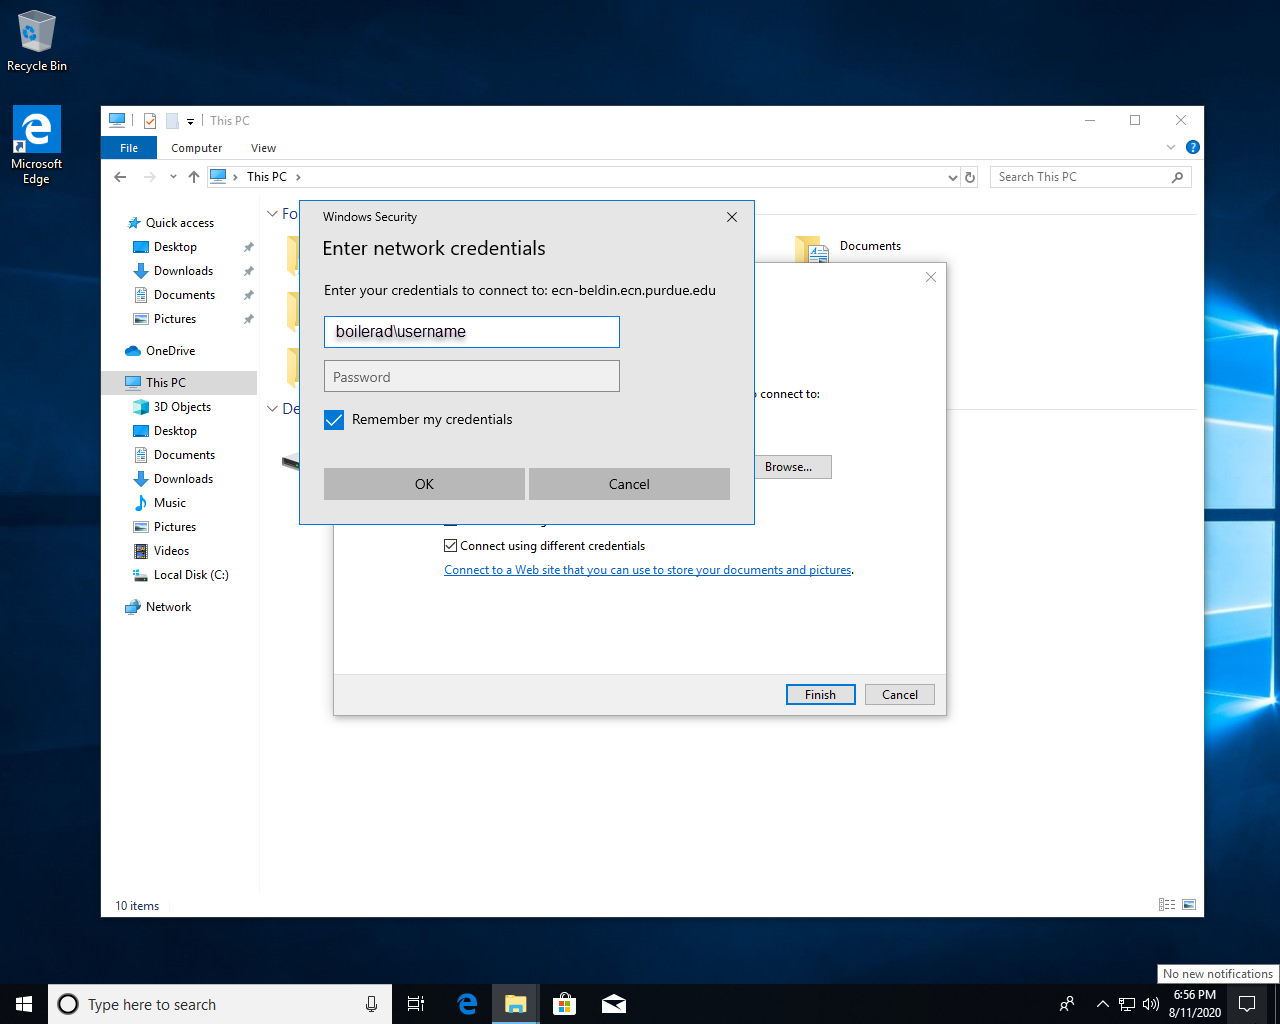
- Once the drive is mapped, copy the following folder to your local hard drive:
For NX 1946: nx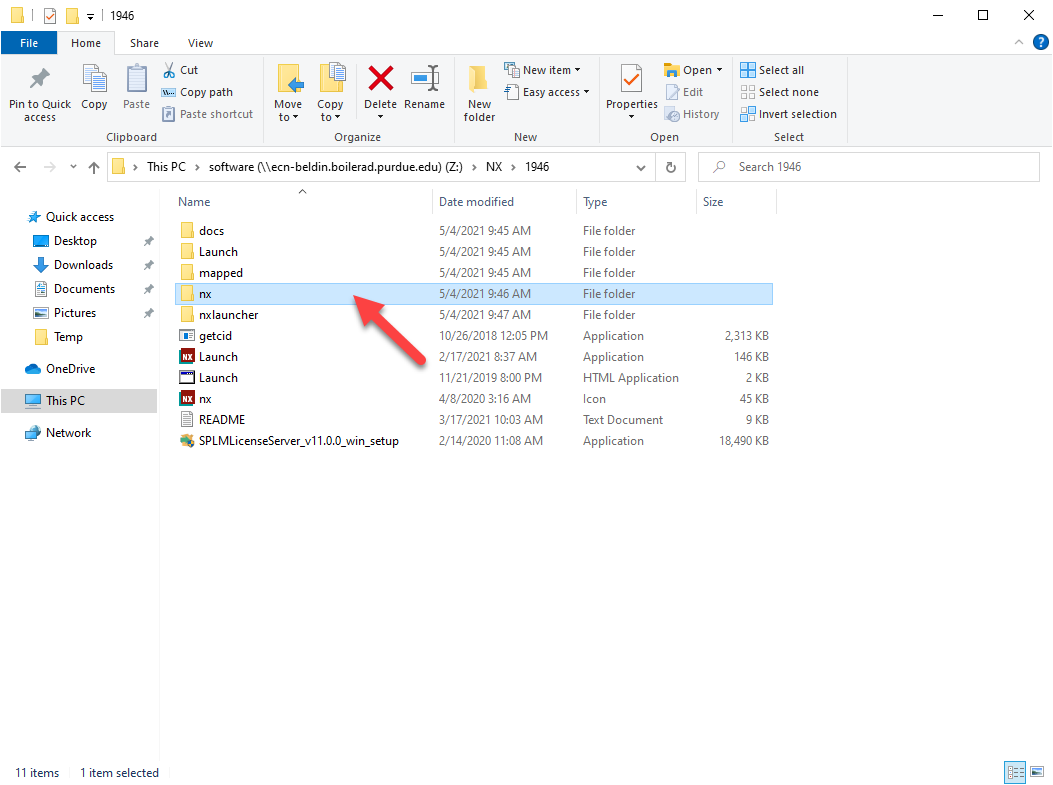
For NX 12: nx1202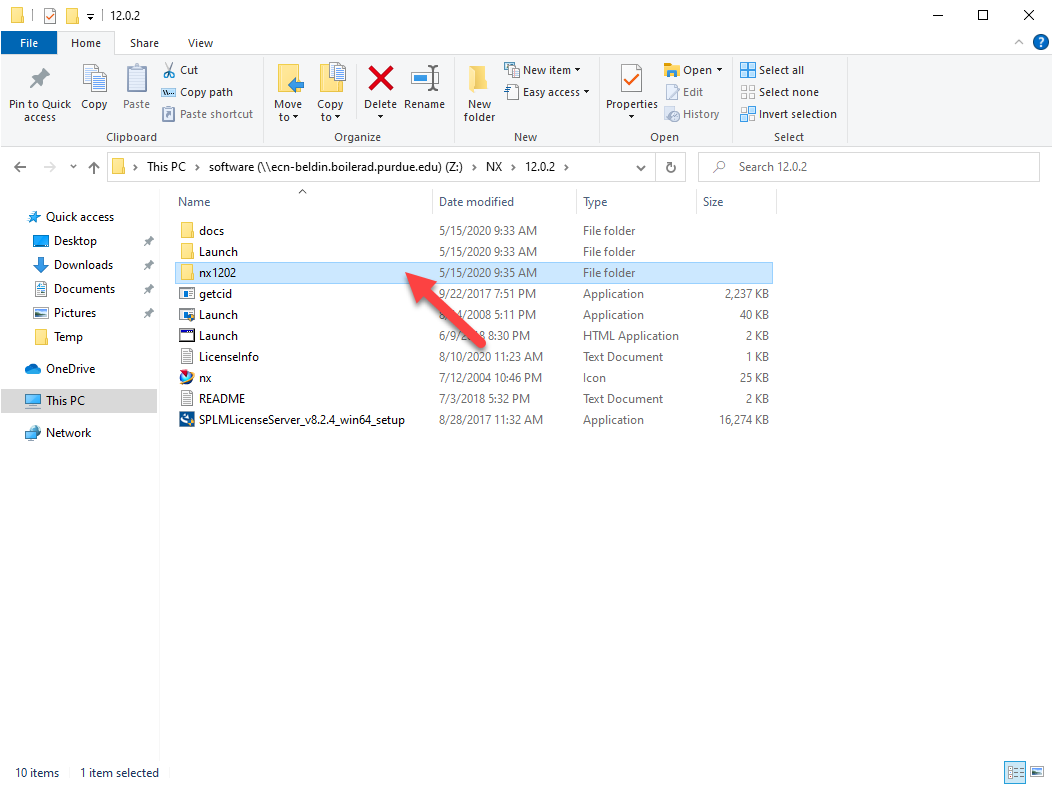
- Launch the setup.exe program in the folder, select a "typical" install, and proceed through the installer until you get to the licensing section.
Enter the following for the license server: 28000@marina.ecn.purdue.edu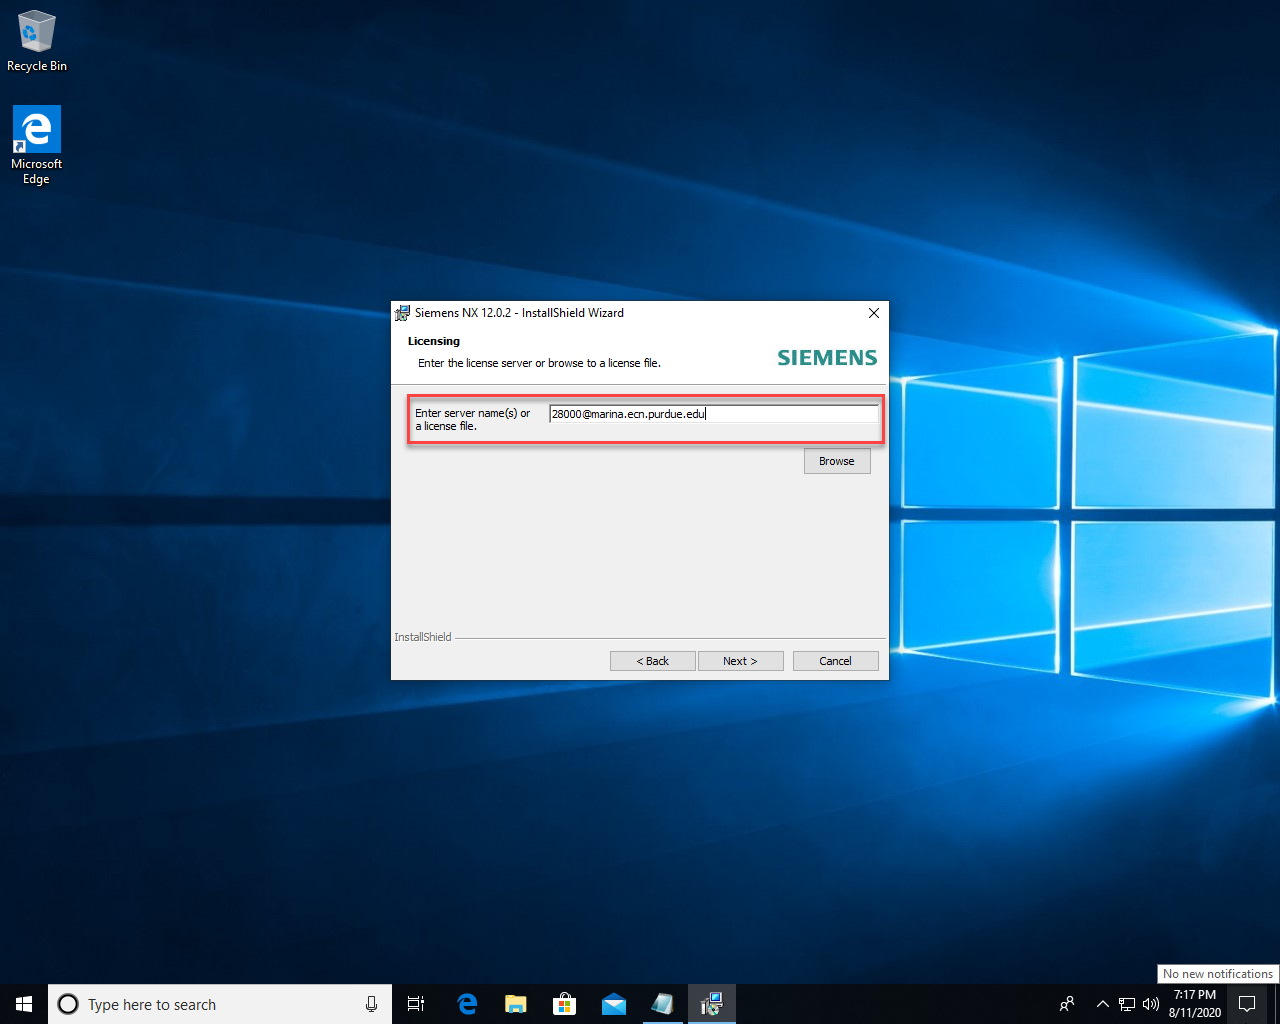
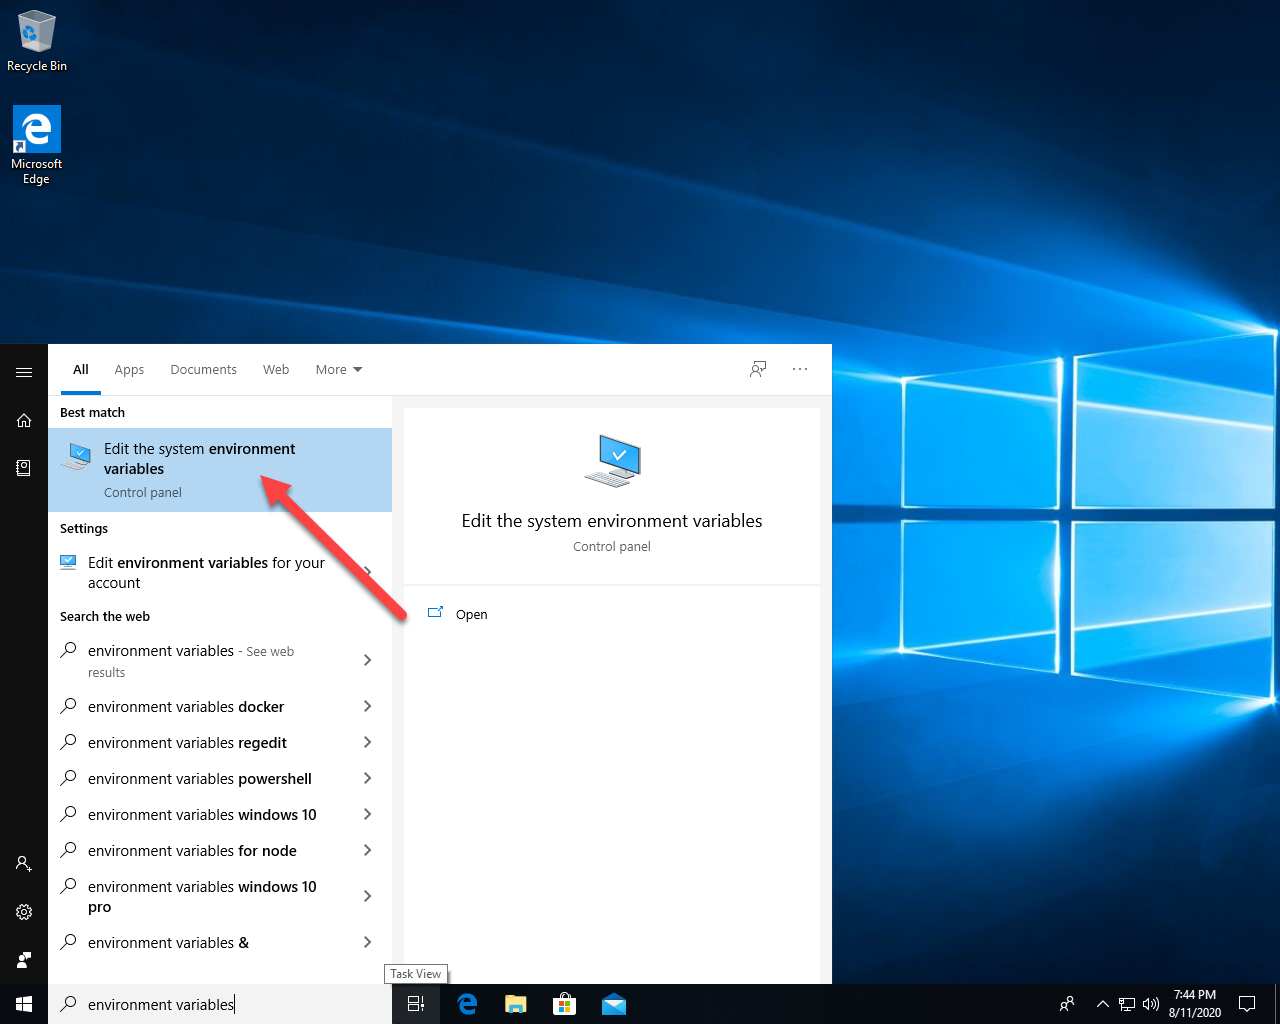
- Proceed through the rest of the installation. Once the install is finished, you'll need to set an environment variable in order for NX to properly use all of its features. Search for "Environment Variable" and you should be able to find the "Edit the system environment variables" option. Launch it.
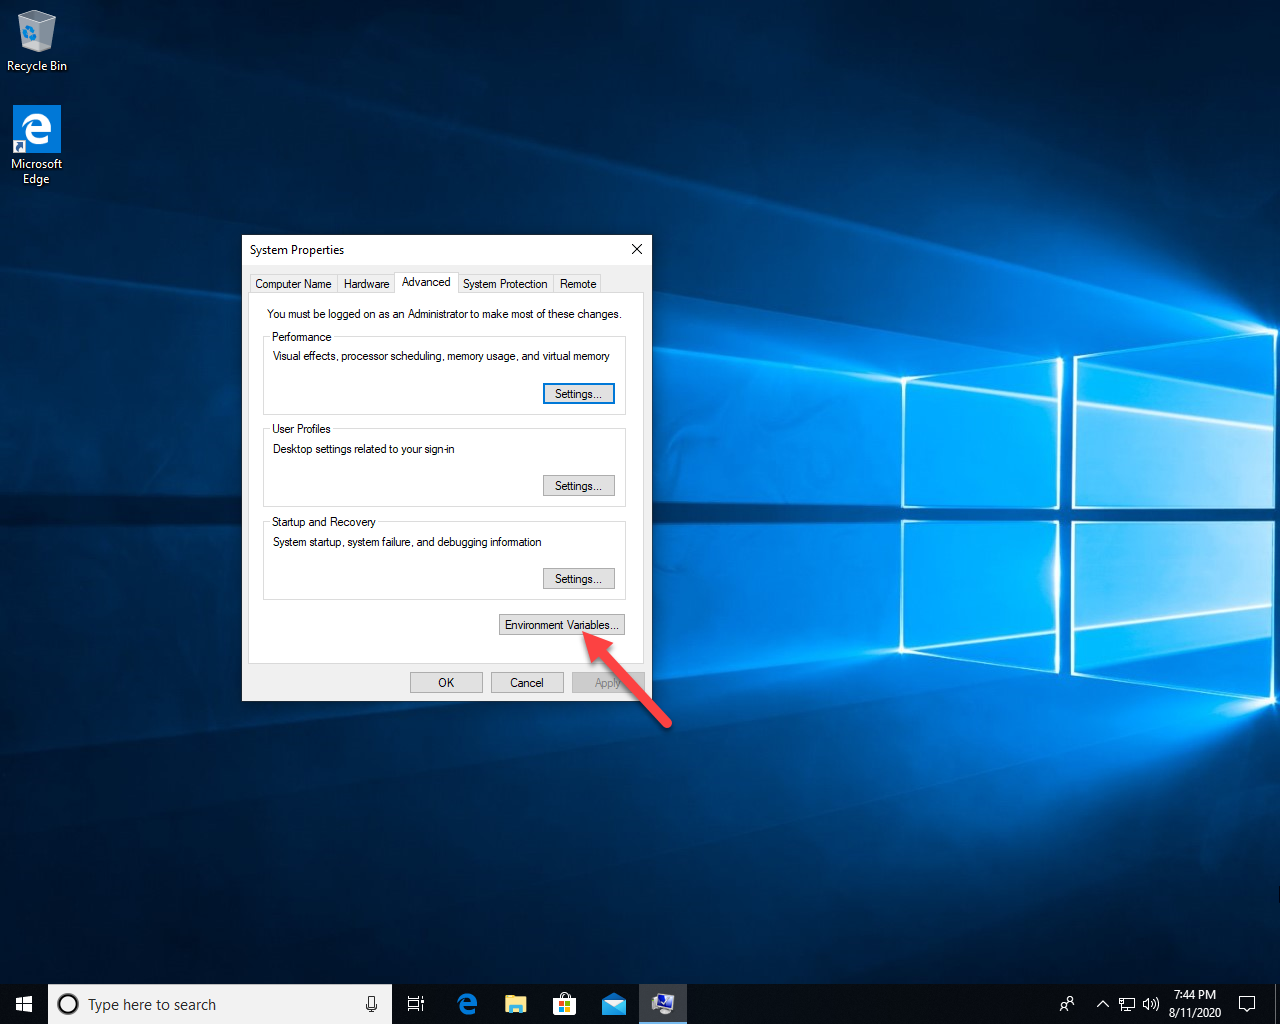
- Click on the "Environment Variables" button.
- Click the "New..." button and fill out the fields as follows: (*Note: use 10 and 11 instead of 30 and 31 as of 3/1/2021*)
Variable Name: UGS_LICENSE_BUNDLE
Variable Value: ACD10;ACD11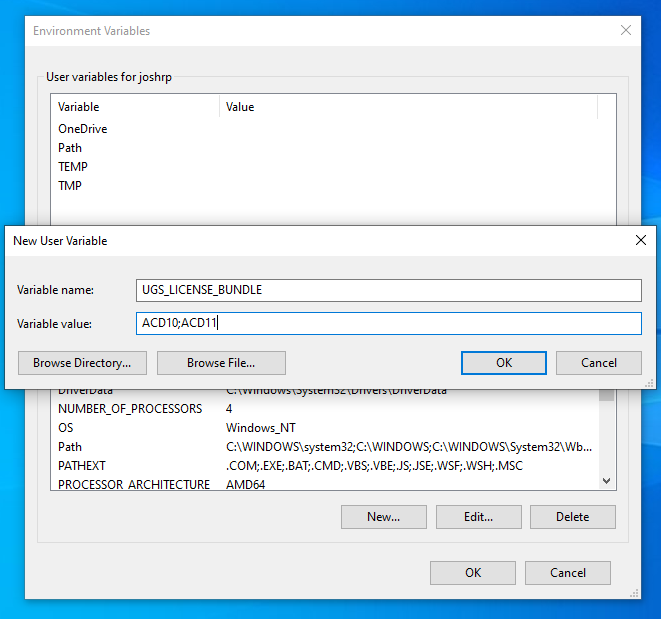
(*Note: use 10 and 11 instead of 30 and 31 as of 3/1/2021*)
Then Click "OK", then "OK" again to close the dialogs out.
With the environment variables set, NX should launch and work properly so long as you are connected to the PurdueVPN.
Troubleshooting Tips:
PLM Connector-
https://purdue0.sharepoint.com/:w:/s/MFETDigitalEnterpriseSystems-DESSCourseMaterials/EVZGIMRAiFhLsCeWEayvjwIBKsBAE8SMVIQhOVvT5bcCIA?e=A4outN
NX Assemblies:
https://purdue0.sharepoint.com/:w:/s/MFETDigitalEnterpriseSystems-DESSCourseMaterials/EUdGgy3i5wdHrNgDwG89cxQBkZ2nPLHCmpOB0tzV2T0fPQ?e=MbodHD
NX Modeling-
https://purdue0.sharepoint.com/:w:/s/MFETDigitalEnterpriseSystems-DESSCourseMaterials/EbEYpQA1ZfhDqXMdgt8rfR4BMY9uIWMtUy7T42w-tJN7dQ?e=fh0e2c
Aras Innovator:
https://purdue0.sharepoint.com/:w:/s/MFETDigitalEnterpriseSystems-DESSCourseMaterials/EVUaz8r-4zRFtUDOrq7Ap4YBgXZpVc8b-N33zaOqbb5eJA?e=PR3iqS
General Computing:
https://purdue0.sharepoint.com/:w:/s/MFETDigitalEnterpriseSystems-DESSCourseMaterials/EXT2vsDyJkBIoeqZfsSY59kBA-BUwDk8nKGarSnxBRpACg?e=QnzdW1
Last Modified:
Dec 4, 2025 3:15 pm US/Eastern
Created:
Aug 11, 2020 8:20 pm GMT-4
by
admin
JumpURL:
