Print this article Edit this article
Zope: Creating a Web based Survey
ECN Created a Zope Product for developing simple surveys on the web. Before you can create a survey using this product you will need some basic understanding of how to use Zope:
Once you are able to login to Zope and create objects it is fairly simple to create a basic survey by completing the following steps:
- Add a Survey Object
- Add a Question to the Survey Object
- Edit options for the Question
- Edit options for the Survey
- Test the Survey
- View the Results
Using Survey Objects
Add a Survey Object
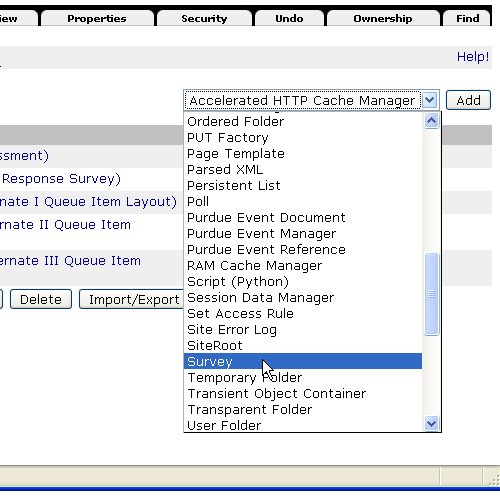
After logging into the Zope folder where you would like to create your survey, select "Survey" from the "Select type to add..." menu. Types are listed in alphabetical order.
After selecting "Survey" you will be taken to the "Add a Survey" screen. Here you must specify an Id and Title:
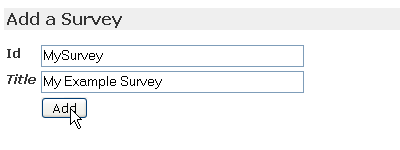
- Id - The unique identifier that will appear in the URL for your survey, this should not contain spaces or special characters
- Title - This is a human readable identifier and can be anything that helps identify the purpose of the survey
Add a Question to the Survey Object
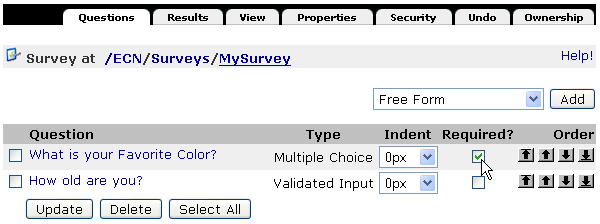
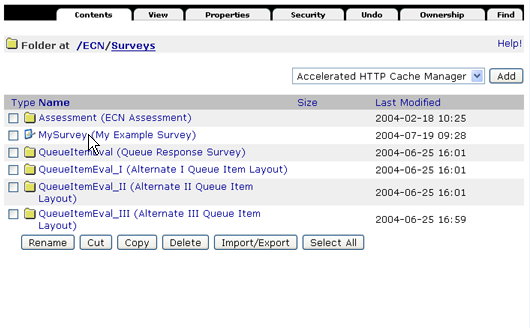
Now that your Survey Object is created we need to add some questions. From the Survey Overview screen pictured below select the type of question that you would like to add.
- Free Form - A free from response question. The user is given an area to type there answer without limitations.
- Multiple Choice - You supply the user with several possible answers to the question. The user may only select one.
- Multiple Scale - The user responds to the question on a scale from 1 to 5.
- Survey HTML - Survey HTML is not a question, but rather a utility for adding HTML code between the questions in your survey. This is useful when defining the scale used for several Multiple Scale questions, or to divide the survey into several sections.
- Validated Input - The user is asked to type in a response, valid responses can be set to Date, Integer, Floating Point, Currency, and Free Form String.
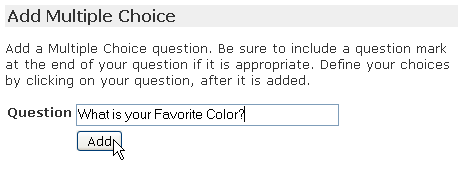
Once the question is added it will appear on the "Survey Overview" screen.
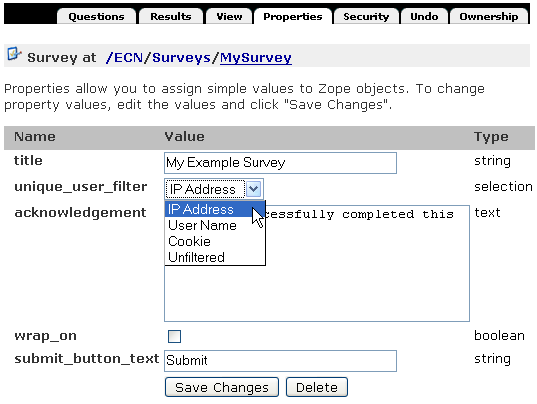
Once all of your questions are added to the survey there are a couple of properties that you may wish to customize for your survey. To edit these options click the "Properties" tab at the top of the "Survey Overview" screen.
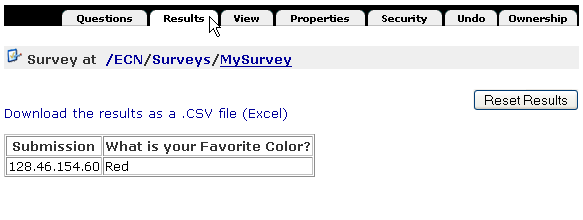
Here you can view the results of your survey, download the results into Microsoft Excel, or reset the results. You will need to reset the results before you can take the survey again. That's the basics, you can now create a functional survey. From this point forward the documentation discusses ways to improve the survey presentation.
Edit options for the Question
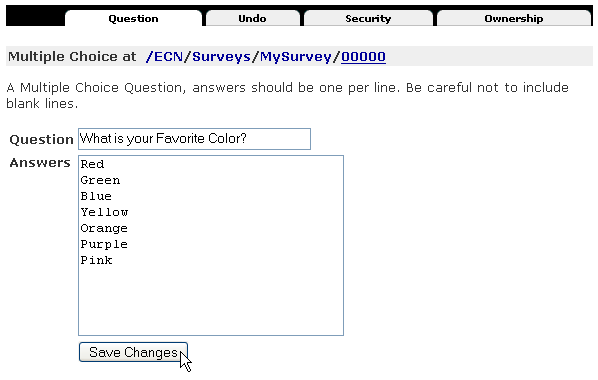
Click on the question you just added to edit the options for that question. The options available to you depend on the type of question that was added. In the case of a "Multiple Choice" question the "Edit Question" screen lets you define the choices available to the person taking the survey. Instructions for each type of question appear at the top of the corresponding "Edit Question" screen.
In this case we added several choices for the user to select and click the "Save Changes" button. Once the changes are saved return to the "Survey Overview" screen by clicking on the Id of the survey in the breadcrumbs at the top of the page, in this case click on "MySurvey". At this point you may repeat the process for adding a question. There is no limit to the number of questions you can add to a survey.
Edit options for the Survey

-
unique_user_filter - Usually you will want each person to take your survey only once. There are several ways to do this using the unique user filter. For surveys that must only be taken once per person User Name is the best option. For more casual surveys Cookie based is the best choice.
- IP Address - Each computer that is connected to the Internet has a unique number called an IP Address. Setting the unique_user_filter to this will insure that the same computer does not take the survey twice. However students that move from one lab to another could take the survey several times. Students who share a computer could only submit the survey one time.
- User Name - If you restrict access to your survey (see Zope: Creating a Restricted Folder) you can restrict access based on user name. Each person will need to login to take your survey. This insures that each person will only take the survey one time, however the survey is not anonymous.
- Cookie - Cookie based user filtering is anonymous and restricts each user account to one submission. However if the user resets their browsers cookie information they will be able to take the survey again.
- Unfiltered - All users are allowed to take the survey as many times as they like.
- acknowledgement - Once the user has completed the survey they will receive the acknowledgement message. This is text thanking the user for taking the survey.
- wrap_on - Turning on this property wraps the survey with the standard_html_header and standard_html_footer when the survey is viewed. This can be used to give the survey a similar look and feel to the rest of your site.
- submit_button_text - The text of the submit button at the bottom of the survey. The default is "Submit".
Test the Survey
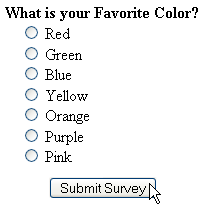
Now that your survey is configured you can test it out by click the "View" tab at the top of the "Survey Overview" screen. Answer the questions you specified and click the "Submit Survey" button.Here you can view the results of your survey, download the results into Microsoft Excel, or reset the results. You will need to reset the results before you can take the survey again. That's the basics, you can now create a functional survey. From this point forward the documentation discusses ways to improve the survey presentation.
Making Survey Questions Required
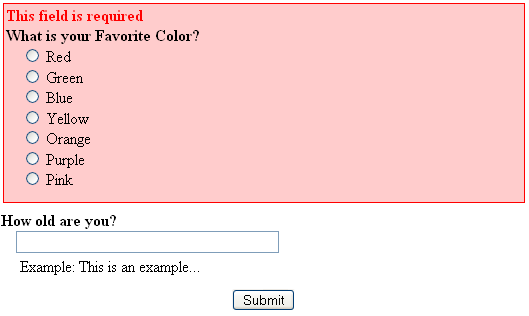
There may be questions that you do not want left blank by users taking your survey. Questions can be set as required from the "Questions" tab of your survey by checking the corresponding box in the "Required" column and clicking the "Update" button.
Last Modified:
Dec 19, 2016 11:12 am US/Eastern
Created:
Oct 9, 2007 11:25 am GMT-4
by
admin
JumpURL: https://eng.purdue.edu/jump/75d43
Categories
- Knowledge Base > Web > Zope > Zope Products

