Print this article Edit this article
WebVPN (Purdue Virtual Private Network) in Mac OS X
See TDX https://service.purdue.edu/TDClient/32/Purdue/KB/ArticleDet?ID=221
NOTE: You will need Purdue Login two-factor authentication to access the VPN service. If you do not yet have Purdue Login 2FA set up, go here for information on how to sign up.
Purdue IT provides a VPN (webvpn.purdue.edu) service to the Purdue community; you'll need it when you are off campus to map a network drive to your ECN home directory and/or to use Microsoft's Remote Desktop Connection to connect to a Windows PC, among numerous other services.
You might know ITaP's VPN service by the names "WebVPN" or "AnyConnect Portal" ... or you might know that a Cisco client application is one way to access the service.
This article provides notes for Macintosh users connecting to VPN for the first time and for Mac users who might be seeing problems on later attempts.
Please be aware that the most current Purdue VPN client will not install on any MacOS less than/older than 10.12.6.
VPN connection instructions for Windows OS can be found here http://eng.purdue.edu/jump/2e76c72
Getting Started
On your Macintosh, launch a web browser (e.g., Safari, Firefox, or Chrome) and go to this web page:
This is Purdue IT's VPN page.
You will see a prompt for your Purdue Career Account username and password.
Enter your Purdue Login username and enter your password with a comma-'push' added to the end (e.g., password,push) and you'll start the process of downloading/installing Purdue's VPN.
Next, you should see a Download & Install dialog box:

Next, you may be prompted to allow the download:
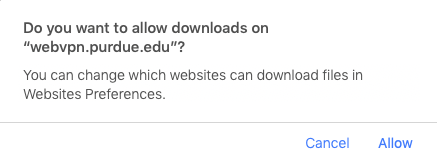
Click Allow to proceed.
Installing the Purdue Cisco AnyConnect VPN client
Locate the file just downloaded in your downloads folder for the browser you used; it should be called "anyconnect-macos-4.8.03036-core-vpn-webdeploy-k9.dmg" or something similar.
Open this "dmg" file by double-clicking on it where it was downloaded.
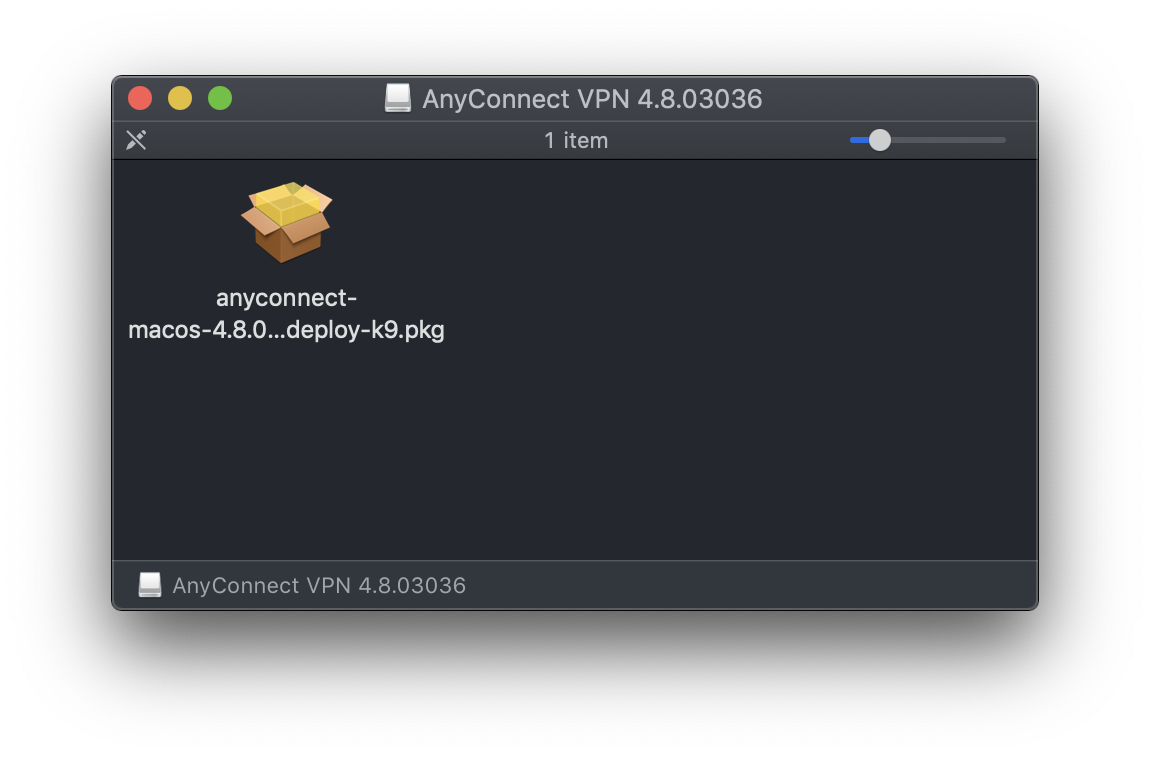
Within the now open dmg(disk image file), double click on the installer package, in this case called "anyconnect-macos-4.8.03036-core-vpn-webdeploy-k9.pkg" but will change relative to the name of the related DMG file you just downloaded.
The next window will appear:
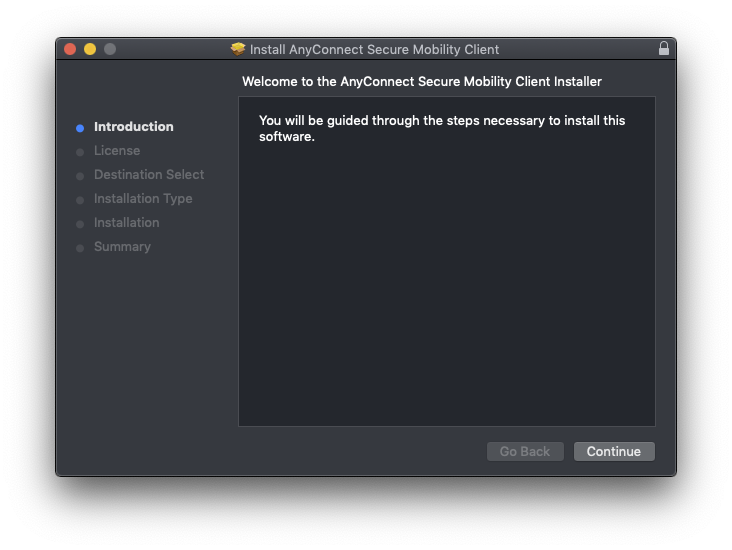
Start by clicking the "Continue" button ... and then follow all of the on-screen instructions you see (all of the default choices are fine) to complete installation of the software.
When it's done, the window will say "Installation was successful." Close the installer.
Open your Mac's Applications folder, and then open the Cisco folder.
CONNECT TO Purdue VPN
Double-click the icon named "Cisco AnyConnect Secure Mobility Client."

The Cisco client will launch, and its window will look like this:
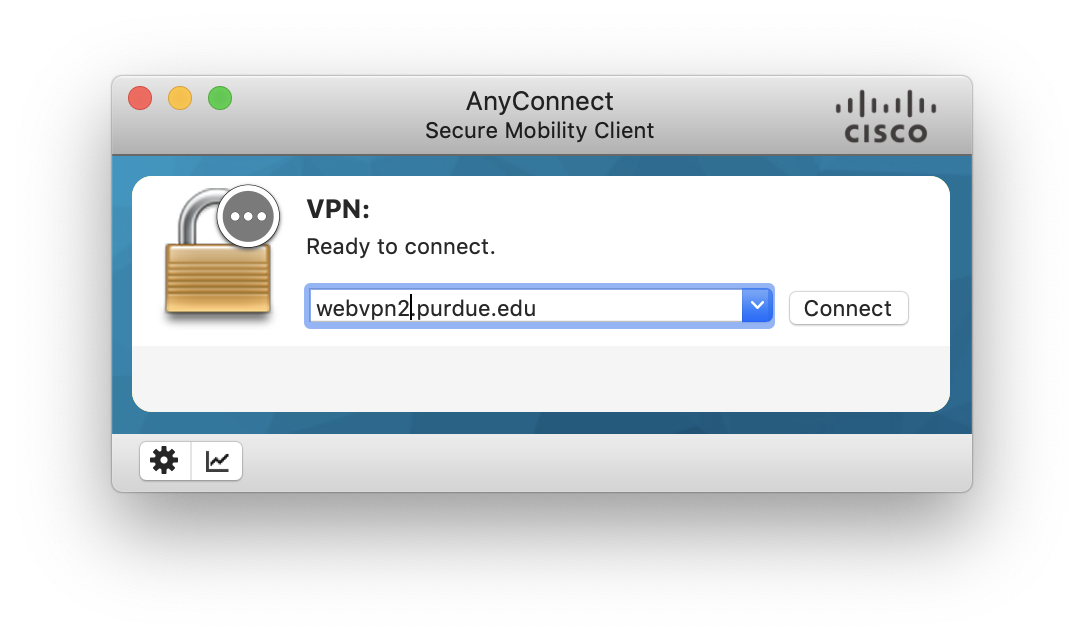
In the field below "VPN: Ready to connect", type exactly the following:
webvpn.purdue.edu
Then click the "Connect" button.
A username and password prompt will appear.
Use your Purdue Career Account username and for your password, enter your Purdue Career Account password with a comma-'push' added to the end (e.g. password,push)
Then click the "OK" button.
The Cisco client will connect to Purdue's VPN service.
If the connection is successful, the window will disappear.
You may now begin any activities that require a Purdue network presence -- mapping a network drive, remotely connecting to a campus PC using Microsoft Remote Desktop connection software, etc.
Disconnecting from Purdue VPN.
The Cisco software adds a menu to your Mac's menu bar near the top-right of your screen. After clicking the appropriate icon in the menu bar, here's what the menu looks like:
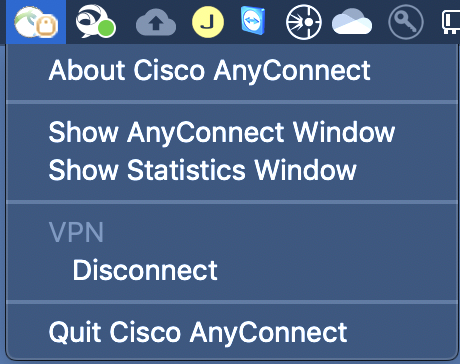
When you no longer need a Purdue network presence, do either of the following:
Select "Disconnect" from that menu. You will be disconnected, and the Cisco software will remain open.
Or, select "Quit Cisco AnyConnect." You will be disconnected, and the software will close.
To reconnect to the Purdue VPN, go back to the CONNECT TO Purdue VPN section and repeat the needed steps.
Last Modified:
Dec 1, 2025 10:44 am US/Eastern
Created:
Sep 24, 2013 12:46 pm GMT-4
by
admin
JumpURL:
