Print this article Edit this article
MJIS 2001 Crestron Instructions
Initial startup and logging in:
Touch the “Crestron” panel if it isn’t currently ‘on’ – once touched you will be presented with the following screen:

Select the black ‘Touch here to start audio visual system’ button. Do not select the red button to start ‘Video Conference Mode.’
After the AV system has started up you should see the following screen:
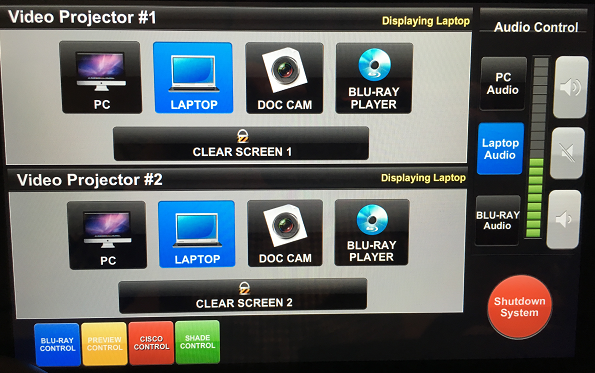
Make sure the screen looks just like the image (laptop selected for both projectors and laptop audio selected and not muted).
To use the system with the desktop, make sure the both projectors are set to use PC. To use the system with the laptop, make sure both projectors are set to use the laptop.
If the laptop is not powered on, turn it on and select the account BME2001 (there is not a password on that account).
You should now be able to proceed with making a presentation.
Hosting a Webex session:
On the desktop there is an icon for “Cisco Webex Meetings” – launch a webex session via that icon.
Once clicked a web page will open up.
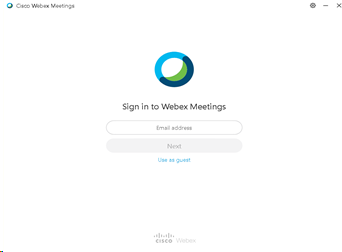
Enter your Purdue email address. Click Next.
You will then need to log in with your Career account using 2-factor authentication.
Once logged in you should click the link to “Start meeting”
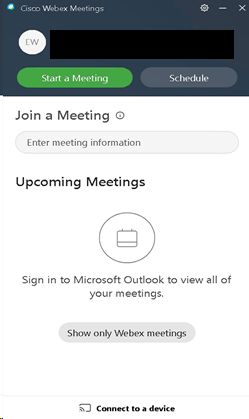
A WebEx session will launch and you will be given a preview window showing the webcam footage.
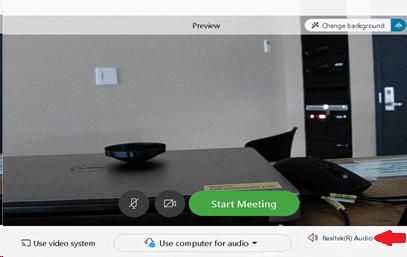
On the Bottom right hand side, you will find the settings options. You will want to make sure to have the system set to use the following settings:
Audio: Crestron Media
Microphone: USB microphone
Camera: PTZ pro 2
You will want to use the same settings for Zoom and Mircosoft Teams.
Your Webex room will now be open and others should be able to join. The link to give others to join will be in the format https://purdue.webex.com/meet/careeraccount (replace ‘careeraccount’ with your Purdue login).
The controls should be straight forward – below is a cheat sheet – hovering your mouse over each control lets you know what it does as well.

When finished click the red X to end the session.
Trouble Shooting:
Please call ECN @ x44326 if you run into any issues not covered.
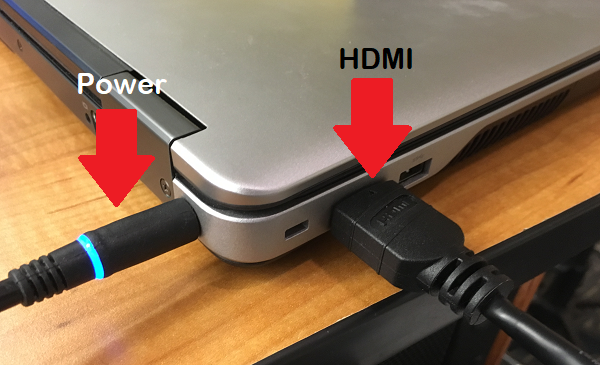
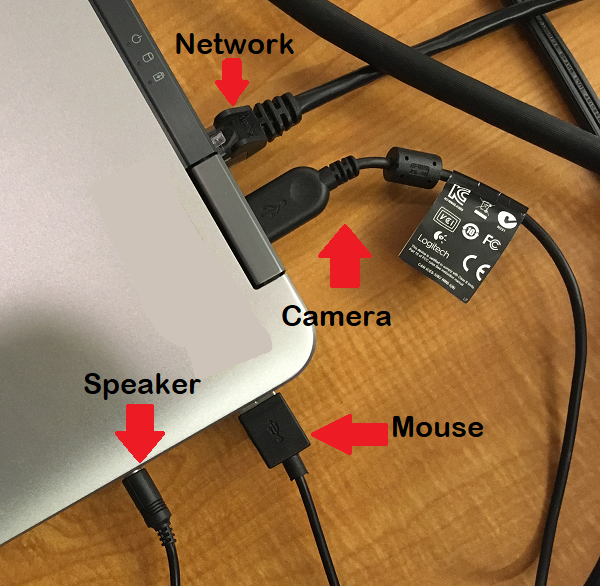
The laptop should be connected as follows – each cable is labeled:
Last Modified:
Aug 20, 2021 3:01 pm America/New_York
Created:
Feb 9, 2021 9:19 am US/Eastern
by
admin
JumpURL:
