The content of this document may be incorrect or outdated.
Print this article Edit this article
Gurobi Windows 7 Installation Instructions
NOTE:
When installing Gurobi, the most important thing to remember is that each free academic license is userspecific. An individual can request multiple licenses, but each must be generated one by one and processed as its own request. The Gurobi site details the steps required to obtain a free academic license.
INSTRUCTIONS FOR INSTALLATION:
1. The user must create a profile on the Gurobi site in order to download the setup files. That registation page can be found here.
2. Install the software. Afterwards, you will have to reboot the machine.
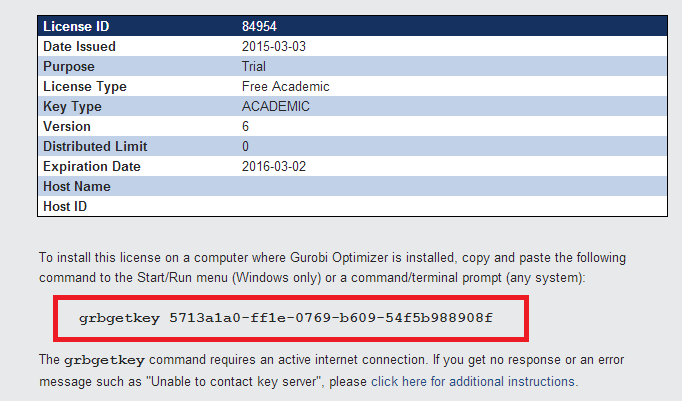
3. Before going any further, it is critical to remember the user specific stipulation mentioned above. If you are installing this for a user, THEY must be logged into the machine using their credentials. You cannot run this script while you are logged in as "ela"-- the software will later reject any other user. Once the user is signed in, open up a Run prompt and launch the grbgetkey script by typing in the license data provided to the user as part of their free academic license. Press Enter. An example of this code can be seen in the figure below:

Figure 1
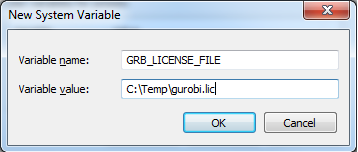
4. Follow the instructions that come up in the script. When asked where you would like to save the license file, choose C:\Temp. Then, you will be asked to create a new environment variable. To do this, go to Control Panel --> System --> Advanced System Settings --> Environment Variables. Under System Variables, click "New..." Then, type in the following information.

Figure 2
5. The installation is complete at this point. Try to open an instance of Gurobi or have the user do so on their own.
Last Modified:
Feb 21, 2022 12:58 am US/Eastern
Created:
Mar 4, 2015 3:42 pm US/Eastern
by
admin
JumpURL:
