*For a .pdf version of this file, click here.*
Touch Screen Controls
User Manual &
Troubleshooting Guide
ARMS B098 Projector System
Step-by-step instructions with pictures for using & troubleshooting the touch screen controls for the projector system in ARMS B098.
 |
|
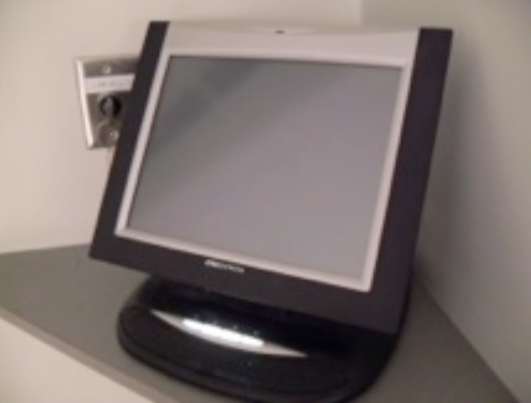
1 This console is located behind the instructor’s table. To get started with the projectors and/or audio, touch anywhere on the screen to turn the console on.
|
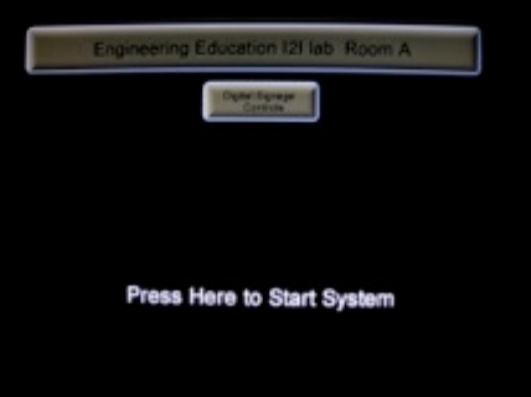 |
2 There are two options here: Digital Signage Controls and Press Here To Start System. The Digital Signage Controls are used for controlling TVs facing the hallways, and are not used for class. To continue, touch “Press Here To Start System.”
|
|
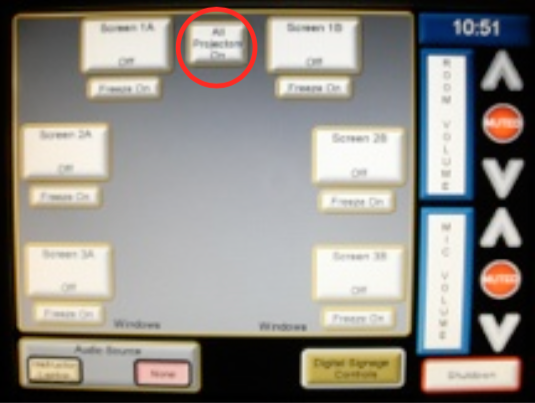 |
3 This is the main screen of the projector system. The main portion of the screen contains all projector-related options, and the bottom-left and far right sides of the screen contain audio-related options. To turn all projectors in the room on, press All Projectors On and continue to step 6.
|
|
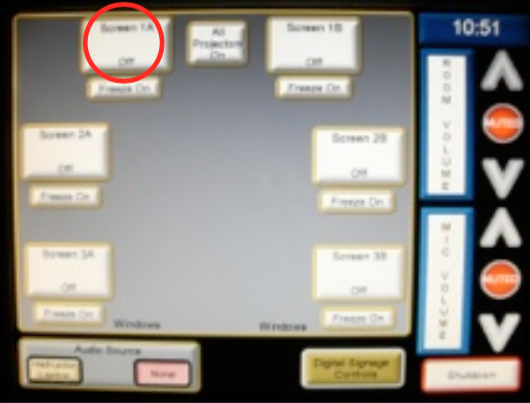 |
4 Another option is to turn on only certain projectors. The screen is laid out as a map of the room, with the console being in the position of the All Projectors On button. As an example, turn on the screen to the left of the console by touching Screen 1A.
|
|
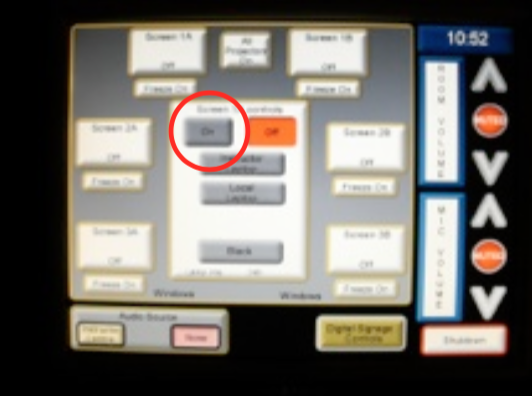 |
5 The center of the screen now shows the controls for the selected projector. Press On to turn only this projector on. To turn on more projectors, repeat steps 4 and 5 for the projectors desired. |
|
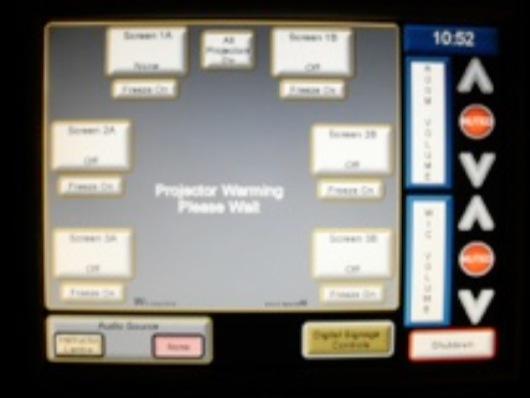 |
6 Regardless of the number of projectors that were just turned on, Projector Warming: Please Wait will display. Wait until this message disappears before using the console again, or the console may freeze. This process can take 2-3 minutes. |
|
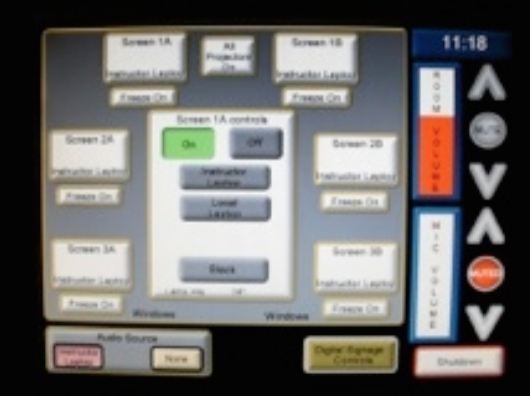 |
7 After the projectors have warmed up, touching the button for a screen will display its controls. There are three choices for video output: Instructor Laptop (connected to the table at the front of the room), Local Laptop (connected to the VGA port on the wall in front of the projector), and Black (blank screen). |
|
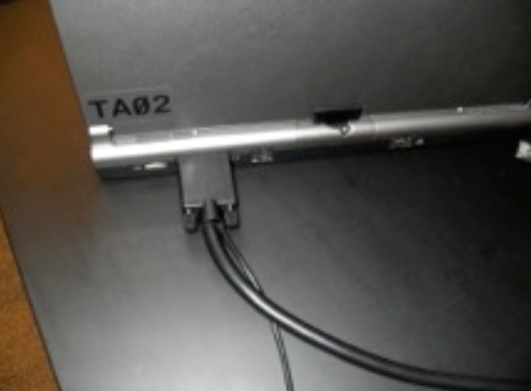 |
8 To use Instructor Laptop for the output, connect the VGA cable to the monitor port on a laptop at the instructor’s table. Then select Instructor Laptop on the console. Likewise, to use Local Laptop, connect a laptop to the port on the wall for the desired projector. If there are no problems after this, skip to step 10. |
|
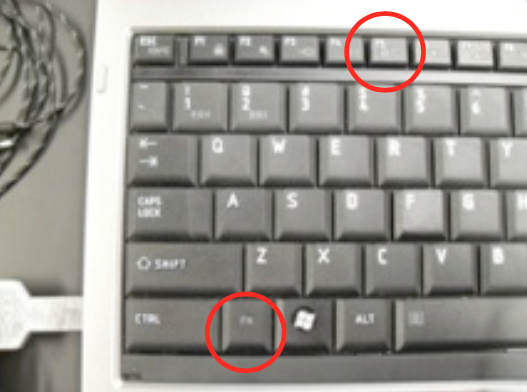 |
9 If the laptop display is not showing on the projector, use the keyboard combination Fn+F5 to cycle through the computer’s video output modes, which are: Laptop Only, External Only, and Laptop + External. |
|
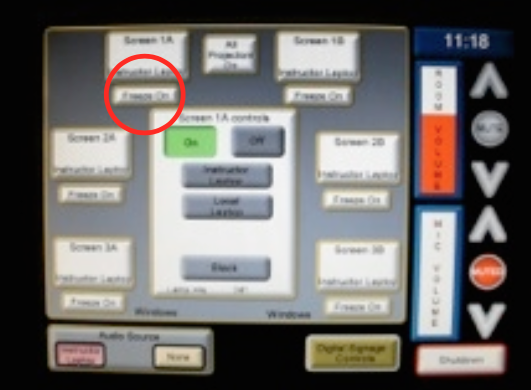 |
10 To freeze the projector’s output, touch Freeze On for the desired projector(s). There is a short delay between touching the button and the projector freezing the image. Wait a few seconds to freeze another projector if trying to freeze separate images. |
|
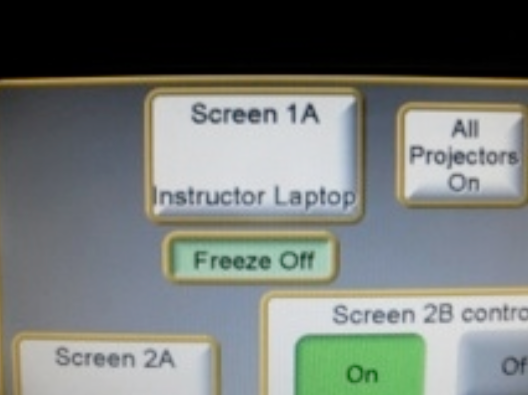 |
11 Touching Freeze On turns the button into a green Freeze Off button. To unfreeze the image on a projector, touch Freeze Off. There will be a short delay again. Wait until the projector changes before touching another Freeze Off button. |
|
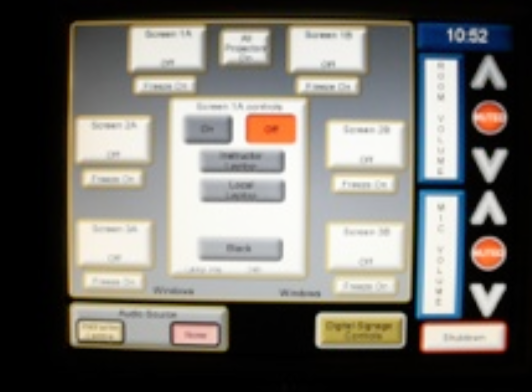 |
12 The audio controls are located on the right side of the screen. In this example, the room volume and microphone volume have both been Muted. To un-mute either control, touch the Muted button for that control. It will then turn gray and display Mute. |
|
 |
13 To control volume levels, touch the up or down arrows. The volume bar will fill with red to show the current volume level. To mute the volume, press the gray Mute button. |
|
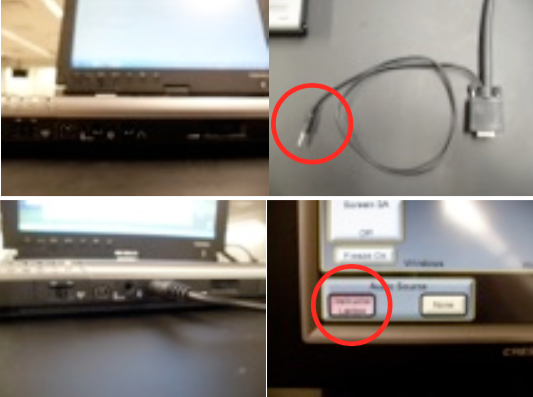 |
14 To use audio from the instructor’s laptop, plug the audio cable attached to the VGA cable into the headphone port located on the front of the computer to the left of the volume dial. On the console, select Instructor Laptop under Audio Source. The currently selected option is shown with a red background. |