Connecting Arduino with MATLAB
To begin working with MATLAB and Arduino in ENGR 13200, students must install and configure the MATLAB Support Package for Arduino Hardware. This setup allows MATLAB to:
- Read data from sensors
- Control actuators (LEDs, motors, servos, etc.)
- Communicate with Arduino in real time
- Use MATLAB scripts for analysis, visualization and automation
Follow the steps below in order, using the screenshots and instructions provided.
Step-by-Step Instructions
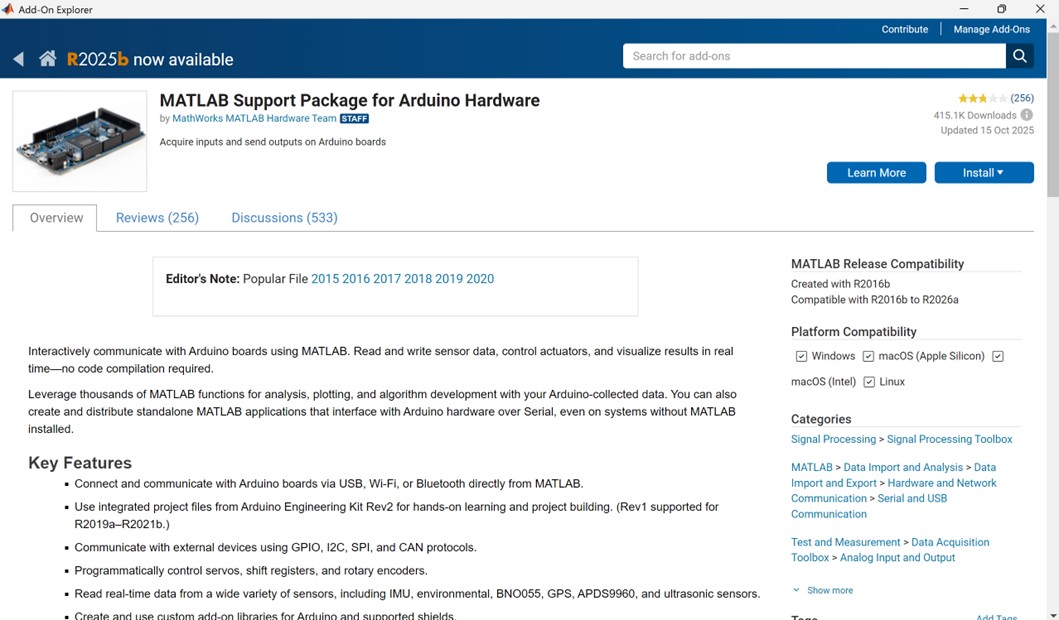
Step One
Locate the Arduino Support Package in Add-On Explorer
- Open MATLAB and go to Home > Add-Ons > Get / Explore Add-Ons
- Search for “MATLAB Support Package for Arduino Hardware”
- When the package appears, select “Install”
Figure 1
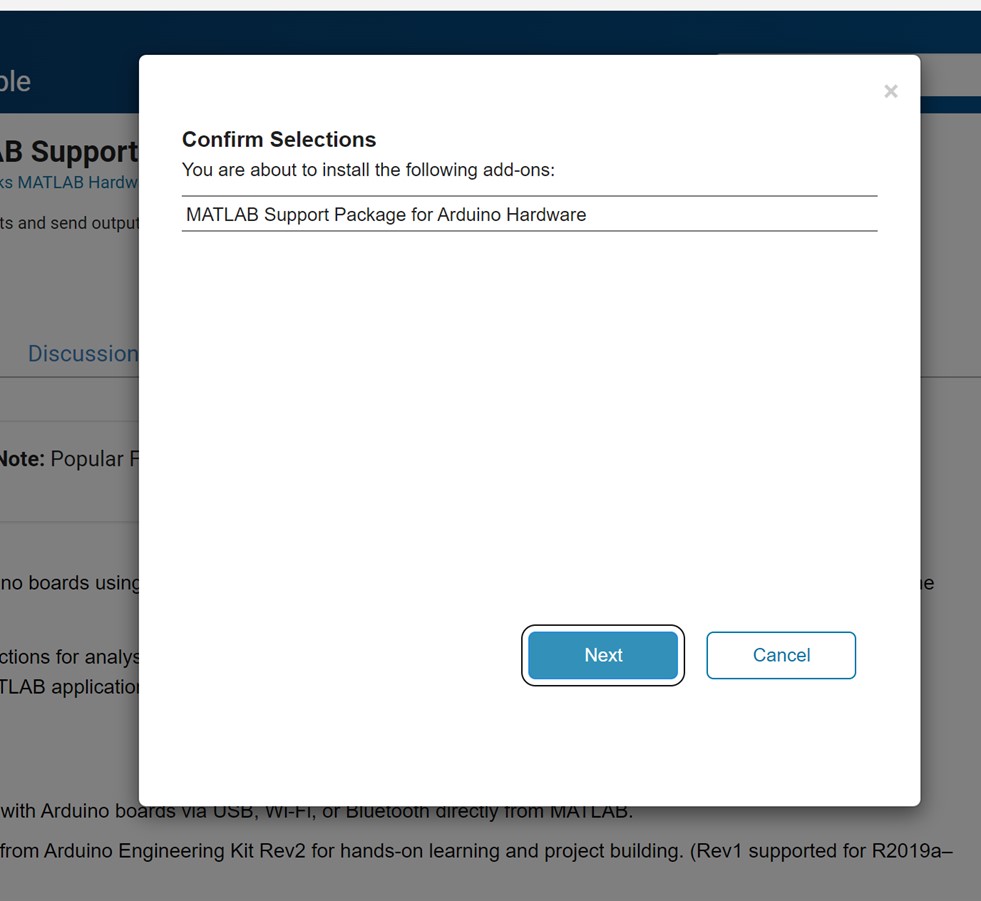
Confirm Installation
Step Two- MATLAB will ask you to confirm the installation
- Click next to continue
Figure 2
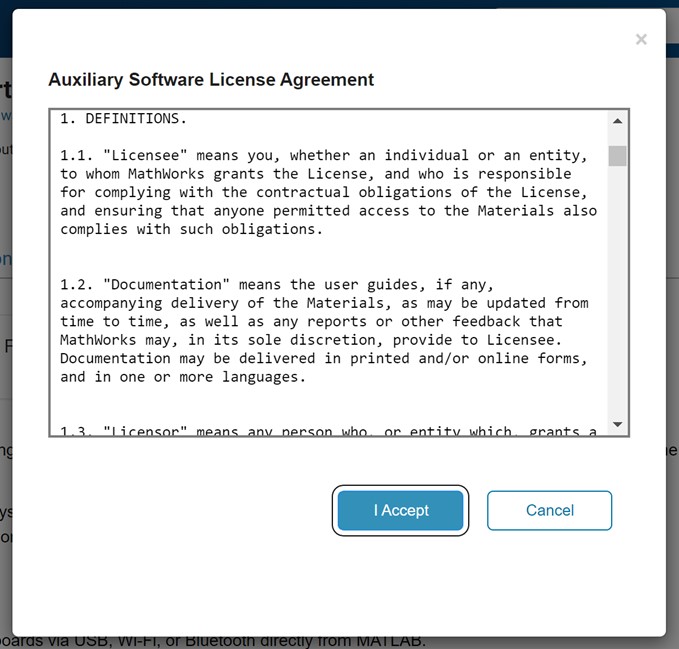
Accept the License Agreement
Step Three-
Review the license agreement and click I Accept to proceed.
Figure 3
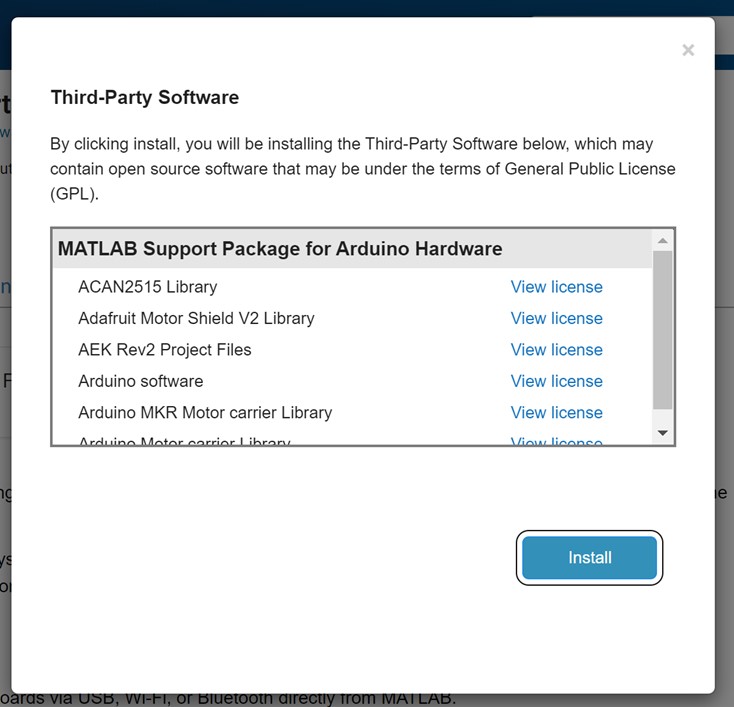
Third-Party Software Notice
Step Four- MATLAB will display the third-party libraries included with the support package.
- Click install to continue.
Figure 4
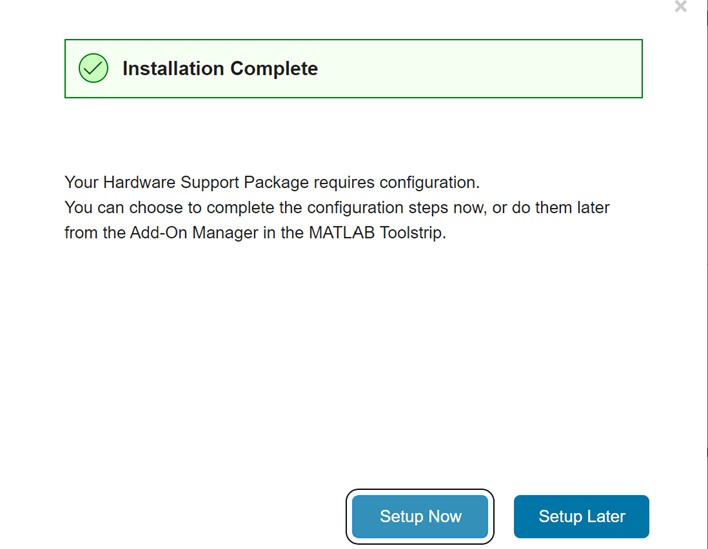
Installation Complete
Step Five- When the installation finishes, select setup now to begin configuring Arduino hardware.
Figure 5
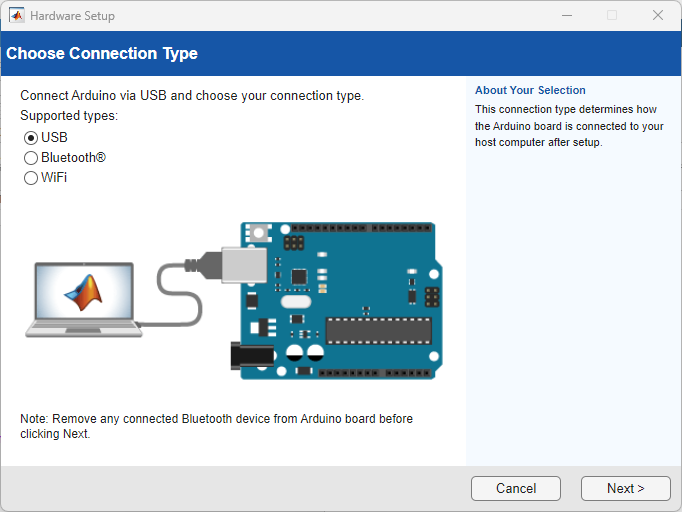
Choose Connection Type
Step Six- Check which Arduino board you are using and select the corresponding connection method
- Select USB and click next.
Figure 6
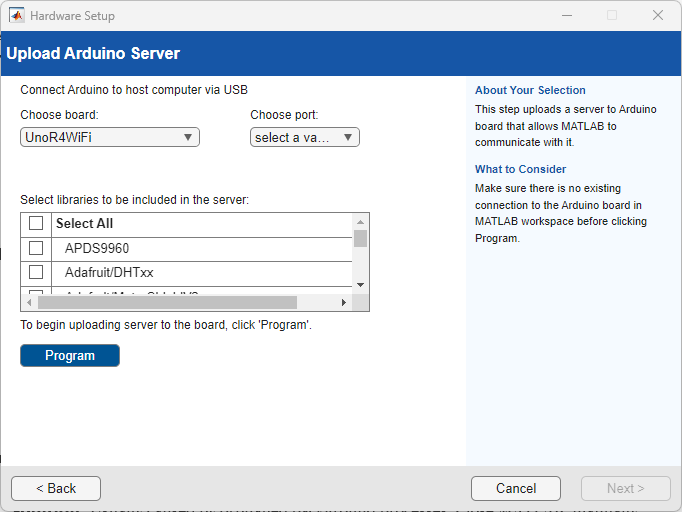
Instruction
Step Seven-
MATLAB will now configure your board:
-
Choose board: UnoR4WiFi
-
Select the correct COM port.
-
If there is no available COM port to select, see the troubleshooting link.
-
- Leave the default libraries checked.
- Click Program to upload the MATLAB server.
-
- Once MATLAB shows a Success! message, click next.
Figure 7
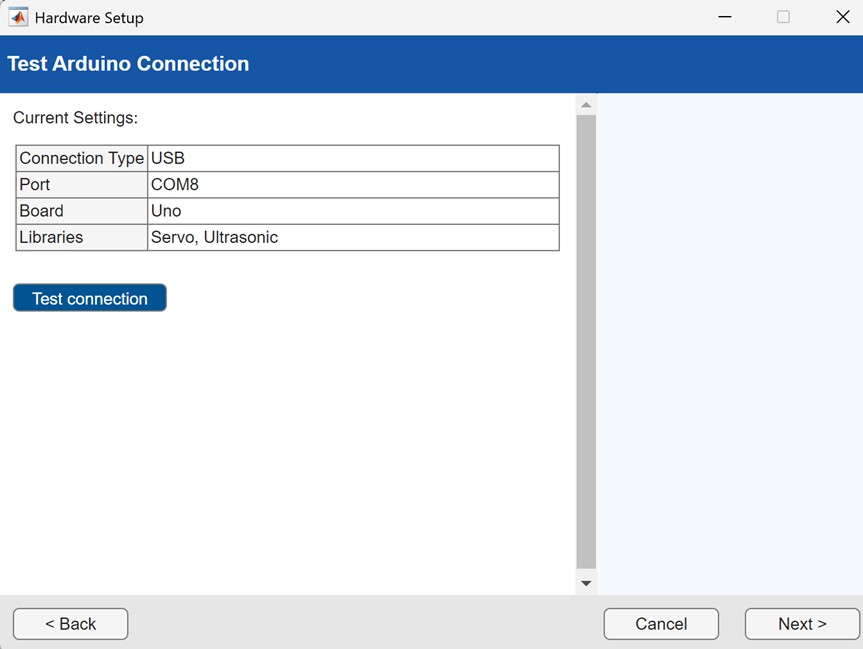
Test Arduino Connection
Step Eight-
MATLAB will show the current settings.
- Click Test connection to verify communication with the board.
- When the test succeeds, click next.
Figure 8: Test the connection to the Arduino board by selecting “test connection,” then click “next” once the test is successful.
Hardware Setup Complete
Step NineFigure 9
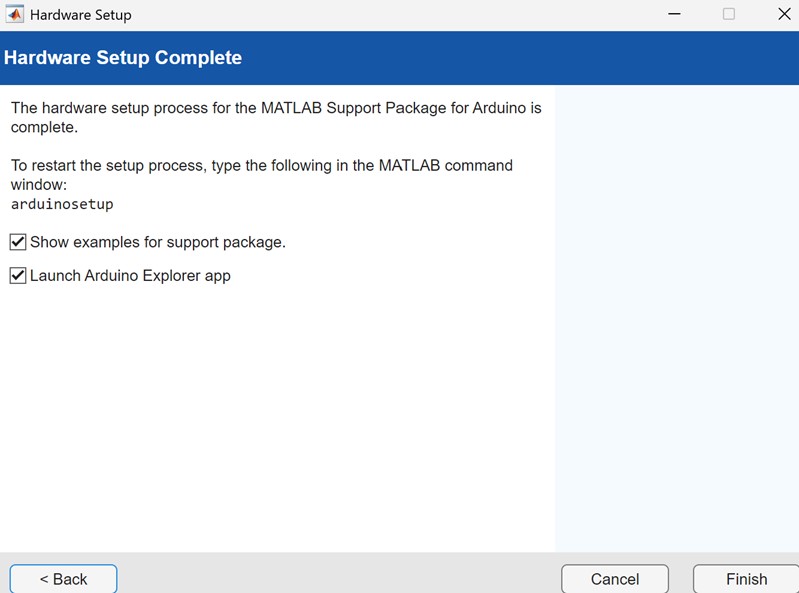
-
Setup is complete.
- (Leave “Show examples” and “Launch Arduino Explorer app” checked.)
- Click Finish to close the hardware setup tool.
-
You should see a new window in MATLAB called "Arduino Explorer"
- The Arduino explorer is a control center designed to help setup and control your hardware. It can be re-located in the APPS tab.
- You should see a new tab in your browser titled "Arduino Hardware"
- The Arduino Hardware page is the central documentation hub for the MATLAB Support Package for Arduino Hardware. This page covers the broader technical capabilities of using MATLAB to program and communicate with Arduino boards.
- Bookmark this page for reference and sample code.